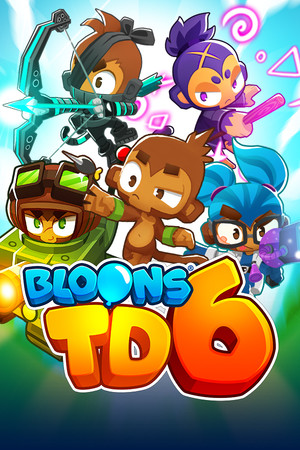
This is a general-purpose guide, not a guaranteed solution for every map, challenge, Boss Event, Race, CHIMPS game, or custom roundset.
Fast answer
The answer before the background
Start with a cheap tower that can handle early rounds, place your hero as soon as the map and cash flow allow, then add one dependable source of lead and Camo coverage before investing in a Tier 5 carry. Most successful routes combine direct damage, support, income, and a specific answer to MOAB-class bloons. For a general beginner route, use a Primary or Magic opener, add a Village or Alchemist support layer, farm only when the map is stable, and save your first major ability for the round that threatens a leak. Upgrade paths should be selected for the job you need, not because every tower benefits from the same crosspath.
Start here
How the four classes fit together
Every ordinary monkey belongs to one of four classes: Primary, Military, Magic, or Support. Heroes are a separate part of the defense with their own experience curves, levels, abilities, and placement restrictions. A strong build normally uses more than one class because each class covers different problems.
Primary towers are usually the easiest entry point. They offer cheap early damage, crowd control, and several straightforward carry options. Military towers provide specialized answers such as long-range damage, water-based placement, aircraft, artillery, or targeted MOAB pressure. Magic towers often supply high scaling, camouflage interaction, damage-over-time effects, or powerful buffs and abilities. Support towers improve income, range, attack speed, damage access, or survivability rather than simply adding another attacker.
- Primary: efficient early defense and reliable crowd control.
- Military: specialist damage, global reach, water placement, and MOAB answers.
- Magic: scaling damage, camouflage tools, debuffs, and utility.
- Support: economy, buffs, discounts, detection, and end-game amplification.
- Heroes: level-based power that rewards early placement and deliberate ability use.
| Build need | Good first question | Typical answer |
|---|---|---|
| Early rounds | Can the opener pop dense groups cheaply? | Use a low-cost Primary, Military, or Magic tower with a suitable targeting position. |
| Camo coverage | Which towers can see Camo Bloons now? | Use an innate detector, a Village route, or an ability that supplies detection. |
| Lead and Purple | Can the defense damage both properties? | Check damage types and add Bomb, fire, plasma, magic, or support-based coverage as appropriate. |
| MOAB rounds | What stops the first BFB, DDT, or BAD? | Build single-target damage, stall, debuff, ability burst, or a combination of them. |
A monkey has three upgrade paths, but a normal tower can only take one path beyond Tier 2. The notation is top-middle-bottom, so 4-0-2 means Tier 4 on the top path, no middle upgrades, and Tier 2 on the bottom path.
Build fundamentals
Read skills and stats before buying upgrades
The most important statistics are damage, pierce, attack cooldown, range, projectile count, damage type, and ability cooldown. Damage answers how hard one hit lands. Pierce answers how many targets a projectile can affect. Attack cooldown is the time between attacks, so lower cooldown generally means faster firing. Range controls which parts of the track a tower can influence, while projectile count and spread determine how well it handles groups.
Do not judge an upgrade only by its displayed damage. A lower-damage upgrade can be better if it adds Camo detection, extra pierce, a useful damage type, a stun, a slowdown, a debuff, or a much shorter ability cooldown. Conversely, a high-damage tower can underperform if it cannot reach the track, cannot hit a required bloon property, or has poor uptime against the round you are preparing for.
Abilities are skills with a deliberate activation window. Use them for a known spike instead of pressing them whenever the button lights up. Defensive abilities should cover a leak or a dangerous rush; offensive abilities should overlap with dense MOAB groups or a Boss phase. If an ability has a long cooldown, plan the round where it must be available again.
- Check whether the upgrade changes damage type or grants a property such as Camo detection.
- Compare the number of targets affected, not just damage per projectile.
- Use range and placement to improve uptime before buying expensive raw damage.
- Treat hero levels as part of the build because later abilities may define the defense.
- In difficult modes, compare total cash spent with reliable round coverage rather than theoretical maximum damage.
| Stat or skill | What it changes | Why it matters in a build |
|---|---|---|
| Damage | Health removed per valid hit | Important against Ceramic, MOAB-class, and Boss targets. |
| Pierce | How many bloons a projectile can hit | Important against grouped bloons and layered rushes. |
| Attack cooldown | Time between attacks | Affects sustained damage and buff value. |
| Range | Area in which targets can be attacked or supported | Determines uptime and whether support reaches the carry. |
| Damage type | Which properties the attack can affect | Prevents wasted cash on a tower that cannot hit the target. |
| Ability cooldown | Time before a skill can be reused | Determines whether the ability is available for the next threat. |
Use Sandbox to compare two routes on the same map and target. Sandbox is useful for testing placement, targeting, ability timing, and upgrade interactions, but a Sandbox result is not proof that the route is affordable in a normal game.
Practical route
A flexible build order for standard games
This route is designed for Normal-style play on a typical map. It is intentionally modular: replace the named role with another tower that performs the same job on your map or in your mode.
First, place one cheap opener where it sees as much track as possible. Upgrade it only far enough to handle the early rounds without leaks. Second, place the hero early if you can do so without sacrificing immediate safety. Early placement gives the hero more rounds to gain experience. Third, add a second damage source or a support tower before the first serious property check, especially if the opener cannot deal with Camo or Lead.
Once the defense is stable, choose one carry route and finish its main path rather than spreading cash across several unfinished towers. Add a crosspath only when it improves the job: extra range, pierce, attack speed, detection, projectile count, or ability utility. Then add economy if the map gives you enough safety to delay combat power. Before the first major MOAB wave, stop farming temporarily and buy the damage, stall, debuff, or ability needed for that wave.
For the late game, add support around the carry instead of building many unrelated mid-tier attackers. A Village can solve detection, discounts, or attack support. An Alchemist can improve the output of nearby towers. Military and Magic options can supply specialized damage or abilities. Keep one emergency option available if the mode includes DDTs, fortified bloons, Bosses, or unusual restrictions.
- Opening: one efficient tower, good placement, and enough upgrades to prevent early leaks.
- Stabilizing: hero plus detection, Lead coverage, and a second damage source.
- Scaling: one main Tier 5 route, then the crosspath that supports its role.
- Economy: farms only after the next dangerous round is covered.
- Late game: buffs, debuffs, stall, and specialized MOAB or BAD damage.
| Stage | Priority | Common mistake |
|---|---|---|
| Rounds 1-20 | Cheap coverage and hero placement | Buying a costly support tower before the defense is safe. |
| Rounds 20-40 | Camo, Lead, Ceramic, and first MOAB preparation | Assuming one tower can answer every bloon property. |
| Rounds 40-80 | Complete a carry route and add support | Leaving several towers at mediocre upgrade tiers. |
| Rounds 80+ | Buff uptime, debuffs, abilities, and BAD or Boss damage | Ignoring ability timing and relying only on displayed damage. |
Exact round breakpoints vary with difficulty, map length, speed modifiers, Monkey Knowledge, co-op cash distribution, and balance updates. If a route fails one round earlier or later than expected, adjust the purchase timing rather than treating the route as invalid.
Focused example
Alchemist support build and route
The Alchemist is best understood as a support-and-damage hybrid. Its value comes from deciding whether nearby towers should receive stronger offensive buffs, whether the Alchemist should make money from suitable bloons, or whether it should contribute direct ability and area damage. Place it so the intended carry remains inside its effective support range, and avoid scattering the buff across towers that are not contributing much.
For a general support route, build the main offensive buff path first and choose the crosspath that improves potion reliability or gives the utility your mode needs. A commonly used notation is 4-0-1 or 4-2-0, but the correct choice depends on the current tooltip, placement, tower density, and whether you need stronger support or more direct Alchemist utility. Do not copy a crosspath blindly from an old video; balance changes can alter its value.
The practical route is simple. Stabilize with your opener, place the hero, build the Alchemist beside the tower that will receive most of the value, then buy the buffing tiers before spending on unrelated damage. If several towers compete for the buff, reposition or consolidate the damage core. For income-focused play, use the relevant money route only after confirming that the map and mode give enough safe targets and time for the investment to repay itself.
- Buff the tower that attacks frequently or has high-value projectiles and abilities.
- Keep the Alchemist close enough for consistent support, but do not sacrifice safe placement.
- Use the in-game potion and upgrade descriptions to confirm current behavior.
- Separate an income Alchemist from a combat-buff Alchemist when the mode allows enough space and cash.
- In CHIMPS or restricted challenges, value immediate support and round coverage over long-term repayment.
| Goal | Route principle | What to monitor |
|---|---|---|
| Carry support | Prioritize the offensive buff path | Whether the carry receives the buff during the whole dangerous section. |
| Income | Use the money-focused route only when safe | Payback time, available targets, and the next required combat purchase. |
| Direct utility | Use damage or ability upgrades for a specific weakness | Whether the Alchemist solves Lead, Ceramic, grouped, or MOAB pressure. |
| Dense defense | Place support to cover several productive towers | Whether shared coverage is actually better than buffing one main carry. |
The Alchemist is not automatically the best purchase in every opening. It is strongest when you already have a tower worth buffing, enough safety to buy support, and a placement that keeps the buff active.
FAQ
Common questions
What does a build notation such as 5-0-2 mean?
It means Tier 5 on the top path, no middle-path upgrades, and Tier 2 on the bottom path. Only one path can normally go beyond Tier 2, so the notation describes a main route plus a crosspath.
Should I place my hero immediately?
Usually, yes, if placing the hero does not cause an early leak. Heroes gain experience over rounds, so earlier placement improves their long-term level timing. Delay placement only when the map or mode requires an urgent tower upgrade first.
How many towers should be in a standard build?
There is no universal number. A compact defense with one carry, one support layer, a hero, and a property-specific answer is often more efficient than many unfinished towers. Add extra attackers when the map has poor coverage, multiple lanes, or a special mode rule.
Is there one best crosspath for every tower?
No. The better crosspath depends on the tower's job, map geometry, target properties, and mode. Choose range, pierce, speed, detection, projectile count, or utility according to the weakness you need to solve.
Why does my late-game build fail despite having high damage?
Displayed damage does not guarantee useful damage. The defense may lack Camo access, Lead or Purple coverage, BAD or DDT answers, ability uptime, range, buffs, or enough pierce for the round density. Test the failing round and identify the first missing property before adding more raw damage.
Sources
What we checked
Official listings establish current availability and product facts. Community pages are used for mechanics and build history, then labeled separately.
- OfficialNinja Kiwi Steam Community Announcements, Update 56.0 and current update archive
- OfficialNinja Kiwi Steam Community Announcements, Update 51.0
- ReferenceBloons Wiki, Bloons Tower Defense 6 overview
- ReferenceBloons Wiki, tower classes and tower mechanics
- ReferenceBloons Wiki, crosspath notation and upgrade-path rules
- ReferenceBloons Wiki, Alchemist reference