Some recommendations are strategic judgment rather than fixed rules. Tower values, relic pools, and difficulty tuning can change in patches, so use the current in-game descriptions when they differ from this guide.
Fast answer
The answer before the background
Start each run by extending the enemy route with the blocks you already have, while leaving room for the largest tower footprints you expect to use. Build one or two towers that cover different parts of that route, then spend later rewards on upgrades, runes, and relics that reinforce one damage plan. Before every wave, check whether enemies can reach the whole maze, whether key towers have enough range, and whether your economy can survive the next upgrade. Clear the early Adventure regions on a comfortable difficulty before attempting Heroic; it teaches the maps and unlocks the permanent progression needed for harder runs.
Start here
Your first five minutes
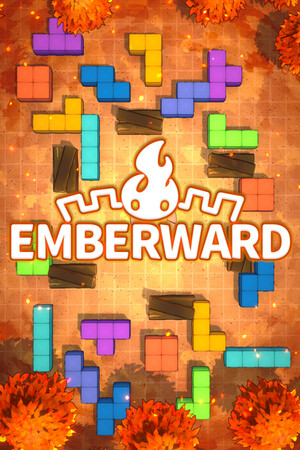
Emberward combines maze building with roguelite tower defense. Before combat, you place tetromino-shaped block cards to determine where enemies walk. During the wave, towers attack along that route. Afterward, you choose new cards, towers, runes, relics, or other rewards and repeat the process.
For a first run, do not try to create a perfect maze. Make the route longer and easier to cover, then reserve open spaces for larger towers. A long early corridor gives basic towers more time to attack, while a maze that folds enemies past the same firing position can become stronger once your damage and range improve.
- Use the full build phase. Test placements before starting the wave instead of committing to the first legal route.
- Check the path preview after every block. A maze that accidentally becomes impassable or forces a short shortcut can waste more value than a cheap tower saves.
- Place your first towers where they see several sections of the route, not just the entrance.
- Keep at least one practical route to the exit. Blocking monsters is not a substitute for solving the path.
| Early decision | Safer choice | Why it works |
|---|---|---|
| First purchase | One or two useful towers | You need immediate coverage without exhausting your economy. |
| Next block | A piece that lengthens or folds the route | Extra time on target improves every suitable tower. |
| Upgrade choice | A tower or relic that matches your current plan | Focused scaling is more reliable than collecting unrelated effects. |
| Large footprint | Reserve space before placing it | A strong tower is wasted if the maze leaves no legal placement. |
The store description confirms the core systems: maze construction, limited block choices, tower placement, run rewards, characters, flames, relics, talents, and multiple modes. The exact order above is a recommendation based on how those systems interact, not a mandatory opening.
Build better
A simple run plan that scales
Use this four-step loop until the game starts showing you more specialized options.
First, identify the route you can extend. Do not fill every convenient tile immediately; some spaces are more valuable as future tower locations than as extra path length. Second, establish basic coverage. Two towers with distinct lines of sight are usually more useful than several towers firing at the same short stretch. Third, choose a direction. If a relic, rune, tower enhancement, or flame strongly supports one damage type, let that offer shape the run instead of continuing to split your resources. Fourth, upgrade the defense that is already carrying waves. More towers are not automatically better when they make the path shorter or dilute your rewards.
- Put damage near repeated bends, long straight sections, or places where enemies pass close to one another.
- Use support effects when they improve several attacks or solve a specific weakness, such as fast enemies or durable targets.
- Read the complete reward text before choosing. A powerful-looking effect may require a tower type or placement you do not have.
- Before a boss, prefer a reliable defense over a greedy economy choice unless your current setup is already stable.
| If you are struggling with… | Change this first | Avoid this reaction |
|---|---|---|
| Enemies reach the exit | Lengthen and simplify the route | Buying another tower with no useful coverage |
| Towers miss too often | Rebuild around bends and shared firing lanes | Assuming more damage fixes poor range |
| A wave is barely cleared | Upgrade your best-covered tower | Spreading coins across every tower |
| Bosses overwhelm you | Reserve a safe route and improve sustained damage | Building only an entrance kill zone |
The developer describes limited wall blocks, route length, tower positioning, and run-specific maps as central decisions. That supports prioritizing path and coverage, but no single maze shape is guaranteed to be best on every map.
Do this next
Progression path from beginner to Heroic
Begin in Adventure Mode and use the lower difficulty that lets you complete stages while learning. Your first goal is not a flawless clear; it is to understand how each region changes pathing, enemy pressure, and reward choices. Clear stages, collect experience, and use the resulting talents and unlocks to make future runs more consistent.
Once a region feels familiar, move up to Normal and revisit earlier areas when you need more practice. The permanent progression system is valuable because it gives later attempts more room for experimentation. Characters and flames can change how a run develops, so try them after you have a basic route-and-coverage plan rather than treating the starting choice as a solution to every problem.
Heroic should be a second pass. It adds more pressure to ordinary decisions, and the post-launch game also places Infernal Shards and special event content behind full-game progression. Learn a region on lower difficulties, then adjust your build for its specific hazards before adding extra constraints.
- First pass: learn the block system, basic tower roles, and the route preview.
- Second pass: improve clear consistency and unlock permanent talents or options.
- Third pass: test different characters, flames, and focused damage plans.
- Later pass: attempt Heroic, then introduce Infernal Shards one at a time rather than stacking unfamiliar penalties.
| Stage of progression | Main objective | Good success measure |
|---|---|---|
| First runs | Understand pathing and coverage | You can explain why a tower is useful before placing it. |
| Early campaign | Build a repeatable economy | Most waves are cleared without emergency purchases. |
| Region practice | Learn map-specific hazards | You can rebuild after a bad reward instead of restarting immediately. |
| Heroic preparation | Reduce randomness in your plan | Your defense survives ordinary waves before modifiers appear. |
An achievement guide is most useful after your first successful campaign clears. Many achievement-specific setups can force awkward choices, while normal progression teaches the systems needed to complete them safely. Treat achievement runs as a second objective, not as your default beginner route.
Avoid these
Common mistakes that end runs
The most damaging beginner mistake is treating the game like a conventional tower defense where more towers automatically solve the problem. Every block used for a tower can affect route length, sight lines, and future placement. A new tower that cannot see enough enemies may be weaker than a longer path or a meaningful enhancement.
Another mistake is building only for the current wave. A route that handles the first enemies can fail when later waves add speed, durability, or special behavior. Leave room to extend the maze and keep at least one tower position that can cover a future bend.
Finally, do not let a promising reward override your actual board. If a relic requires a tower you do not own, or a rune only matters on a different footprint, its theoretical strength is irrelevant this wave. Choose the option that improves the defense you can field now.
- Do not spend the entire opening budget on towers before shaping the route.
- Do not fill every corner when you may need space for a larger tower.
- Do not split into several damage themes without a reward that clearly supports the split.
- Do not start Heroic because a lower difficulty feels easy; first prove that your build survives bosses consistently.
- Do not copy an old community build without checking current in-game descriptions after a patch.
| Mistake | Visible symptom | Correction |
|---|---|---|
| Tower spam | Short route and weak coverage | Sell the idea of quantity; improve route length and upgrade the best tower. |
| No future space | Strong reward cannot be placed | Reserve open areas around bends and broad sections. |
| Unfocused rewards | Many effects, no clear payoff | Choose one main damage plan and use support effects around it. |
| Ignoring map rules | A familiar build fails suddenly | Read stage modifiers and adapt the maze before combat. |
The official 1.0 notes include tower, relic, character, map, and mode adjustments, plus later fixes. Community advice can therefore become outdated even when its general principles remain sound.
FAQ
Common questions
What should I buy first in a new run?
Start with enough blocks to create a route that gives your initial towers time on target, then buy one or two towers with useful coverage. After that, prioritize upgrades or rewards that strengthen the towers already working. A fourth tower is rarely the answer if the first three only see a short path.
Should I make the maze as long as possible?
Usually, a longer route is safer early because it increases attack time. However, length is not the only goal. A route that prevents towers from seeing enemies, leaves no room for large footprints, or costs too much to maintain can be worse than a shorter route with repeated firing lanes.
When should I try Heroic?
Try it after you can clear the relevant region reliably on a lower difficulty and understand its map mechanics. Heroic rewards focused builds and punishes greedy tower spam, so enter with a plan for route length, tower coverage, and the region's special threats.
Are community or Reddit builds safe to copy?
Use them as ideas, not guarantees. The developer has continued changing towers, relics, characters, maps, and modes. Check the current in-game text and confirm that the build was made for the same release and difficulty.
How should I approach achievement hunting?
Finish a normal campaign route first, then target achievements that require unusual characters, tower layouts, or difficulty conditions. Separating learning runs from achievement runs prevents a forced setup from hiding the basic strategic mistake that caused a loss.
Sources
What we checked
Official listings establish current availability and product facts. Community pages are used for mechanics and build history, then labeled separately.