This guide contains light spoilers for progression, difficulty, achievements, and card-management mechanics.
Fast answer
The answer before the background
For your first successful runs, choose one clear plan in Limbo: a tower-focused build or a single damage type such as Holy or Unholy. Build a compact deck, use reward cards instead of skipping them, and keep reusable white and green structures cycling through your hand. Upgrade damage, attack speed, area of effect, range, or healing only when those effects support the structures you are actually using. Do not chase Torment immediately. First complete normal runs, unlock more cards and characters, and learn which cards disappear after use. When you begin Torment, simplify your build further and prioritize survival, structure count, and reliable damage over flashy combinations.
Start here
Your first ten minutes
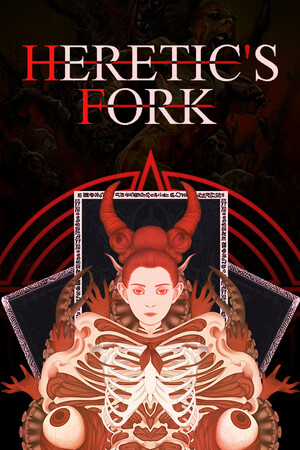
Heretic's Fork combines tower defense, deckbuilding, roguelike progression, and bullet-heaven combat. You are protecting Hell's rift while punishing sinners with towers and other structures. The important beginner lesson is that a run is won by a coherent engine, not by collecting the most impressive-looking cards.
Begin each run by examining the first available rewards and deciding what they suggest. If the early options support towers generally, stay tower-focused. If several cards improve Holy, Unholy, or Hellfire damage, choose that damage family and stop spending valuable choices on unrelated bonuses. You do not need a perfect plan; you need a plan whose cards improve one another.
- Place enough early damage to survive the first waves before hunting for a high-tier combination.
- Prefer a reward that improves your existing plan over a powerful card that creates a second plan.
- Inspect each active structure's description. Its listed affected stats are more reliable than assuming every buff applies to everything.
- Use the pause function when comparing cards, especially before a reward or shop choice.
| Early decision | Safer beginner choice | Why it helps |
|---|---|---|
| Build direction | One damage type or one tower family | Most bonuses become relevant instead of sitting unused. |
| Deck size | Roughly 13 to 15 cards when possible | A smaller pool makes useful cards appear more often. |
| Structure upgrades | Merge only when space or a guaranteed upgrade matters | An unmerged pair can provide more attacks than one higher-tier card. |
| Reward choice | Take a card while learning | Skipping can leave your deck weaker and slows future combinations. |
A mixed build can work, and experienced players may deliberately break these guidelines. The purpose of this opening route is to reduce dead cards and teach the game's interactions.
Core mechanics
How to manage cards and structures
The deck is larger than the cards visibly held in your hand. Community testing reports a minimum deck size of 13, with the draw, discard, and merge area included. If your active pool becomes too small, the game can fill it with rocks. Staying near the minimum while you learn therefore makes your draws more predictable, although later unlocks can justify a larger deck.
Card rarity also affects how you plan a turn. White and green structures can be reusable, while higher-tier structures may disappear after use. Check the card for its disappearance marker rather than assuming every powerful card is permanent. Reusable low-tier cards can be valuable tools for repeated merges and for filling empty structure slots.
The merge area is not only a place to throw away weak cards. If you create a useful card but cannot afford it immediately, leaving it in the merge slot can preserve it for the next round. Likewise, two copies of the same card can offer a more predictable upgrade path when the matching higher tier is unlocked.
- Keep a couple of recurring buff cards if they support your entire build; do not upgrade every buff automatically.
- Use structure count rewards seriously. More firing structures can be stronger than a small percentage increase to one tower.
- Do not merge two towers simply because the merge button is available. First ask whether the current pair gives more total attacks or coverage.
- Before buying a card, consider whether it improves your present build or merely looks strong in isolation.
| Mistake | What usually happens | Better habit |
|---|---|---|
| Adding every damage type | Many cards do not help the same structures | Choose a family and reject attractive distractions. |
| Merging immediately | You lose attacks or coverage for a modest upgrade | Merge when you need space or the upgrade changes the fight. |
| Skipping most rewards | Your deck gains fewer useful pieces and fewer merge opportunities | Take the best compatible option until you understand the economy. |
| Ignoring healing | A good damage engine collapses in a later circle | Reserve at least one route to sustain or recover structure health. |
The game's store description verifies the deckbuilding, tower, damage-type, circle, and reward framework. The precise deck-size and reuse behaviors come from community testing and should be rechecked after major balance updates.
Progression path
What to do after the tutorial
Your first goal is not a perfect achievement run. It is to complete normal shifts consistently enough that you understand the circle order, reward choices, and your preferred damage plan. Each failed run should answer one question: did you lack damage, structure slots, healing, range, attack speed, or a way to handle the next circle? Change one part of the build on the next attempt so you can identify what helped.
Once normal runs are comfortable, experiment with different characters and departments. The official achievement list includes completing shifts with several characters, upgrading towers and garrisons to tier 5, purchasing cards with credits, reaching later circles, and completing challenges. These objectives naturally encourage variety, but they are easier after your basic card-management habits are established.
Only then move into Torment. Start at the lowest available level and use a conservative build. Torment guides often recommend tightly focused engines involving named cards, critical chance, or a particular tower combination, but those routes depend on unlocks and luck. If the required card does not appear, do not force the plan; use a sturdy fallback or restart only when you are deliberately practicing that route.
- Normal difficulty: learn the map flow, build a reliable damage engine, and unlock options.
- Early Torment: reduce experimentation and prioritize damage, structure count, and sustain.
- Higher Torment: use a tested build, track which cards are essential, and accept that some runs will be lost to poor offerings.
- Achievement cleanup: pursue damage-type or character-specific goals after you can reach the required circle reliably.
| Stage | Main objective | Good question to ask |
|---|---|---|
| First runs | Survive and identify a damage theme | Which cards actually improve my starting structure? |
| First clear | Finish normal progression | Where does my build stop scaling? |
| Early Torment | Protect consistency | Do I have enough damage and healing before the next circle? |
| Challenge cleanup | Target achievements and tasks | Can I satisfy the restriction without weakening the whole run? |
Community guides disagree on the easiest high-Torment route. One recent guide favors an Unholy critical-hit plan, while older advice favors avoiding Hellfire and garrisons early. Neither is a universal requirement.
Practical checklist
Common mistakes that end runs
The most common failure is building horizontally instead of vertically: adding one Holy card, one Unholy card, one Hellfire card, and several unrelated structures. The result looks flexible but rarely receives enough compatible bonuses. Pick a lane early, then spend the rest of the run making that lane efficient.
Another mistake is overvaluing rarity. A high-tier card can disappear after use, while several lower-tier reusable cards may deliver more sustained coverage. Compare what the card does over multiple turns, not only its displayed tier. Similarly, a damage buff is not automatically better than an additional structure if your current board has empty slots.
Finally, do not treat every community build as a guaranteed walkthrough. Some recommendations assume specific unlocks, favorable rewards, or a particular patch. Use them as experiments, record what failed, and keep a fallback plan for ordinary runs.
- Do not spend all of your resources on one fragile tower before securing basic coverage.
- Do not neglect attack speed or area of effect when enemies begin arriving in groups.
- Do not confuse a card that affects towers with one that affects garrisons or a specific damage type.
- Do not chase a late-game achievement during a run that is already failing; secure the clear first.
Developer announcements have documented fixes for enemy speed, gamepad selection, Torment access, card behavior, and rare tower-combination issues. If a control or interaction behaves differently from this guide, check the game's latest update history before assuming your run is invalid.
FAQ
Common questions
Is this game closer to tower defense or a deckbuilder?
It is both, with bullet-heaven pressure layered on top. Towers and structures handle the defense, but the deck determines what upgrades, buffs, and replacements you can access during the run.
Should I use garrisons in my first runs?
You can, but a tower-only or single-damage-type plan is usually easier to read while learning. Garrisons become more attractive once you understand which bonuses affect them and how they fit into your deck.
Should I skip a reward if none of the cards look useful?
While learning, usually take the least harmful compatible card rather than skipping. A higher-rarity card can save merge steps, and a modest buff may become valuable later. Skipping is better reserved for deliberate, streamlined builds.
When should I start Torment?
Start after you can complete normal runs with a repeatable plan and explain why your build failed when it loses. Torment magnifies weak scaling and poor card choices, so more unlocks and better familiarity are usually more valuable than rushing the difficulty.
Is there a guaranteed achievement route?
No universal route is verified. The official list contains 29 Steam achievements, including character clears, tier-5 upgrades, circle progression, challenges, and damage-specific goals. Plan achievement attempts around a strong run rather than sacrificing every run to one restriction.
Sources
What we checked
Official listings establish current availability and product facts. Community pages are used for mechanics and build history, then labeled separately.
- OfficialOfficial Steam store page
- OfficialOfficial developer announcements and patch notes
- OfficialOfficial Steam achievement list
- CommunityCommunity gameplay basics guide
- CommunityCommunity Torment strategy guide