Some hero and base-stat details come from a maintained community reference because the publisher does not provide a complete current character table. Treat exact values as reference data, not as a promise that every platform build displays identical numbers.
Fast answer
The answer before the background
The strongest general route is to choose a hero that covers your weakness, then build around one job: funnel enemies, control crowds, or deal direct damage. Cygnus is the safest mana-heavy caster, Vorwick is the toughest frontline option, Egan is the most forgiving control pick, and Kelsey is a durable close-range choice. For most missions, take barricades, one dependable damage trap, one crowd-control trap, one answer to special enemies, and a weapon that can finish anything that leaks. You can change heroes in the Spellbook and edit traps, weapons and trinkets before a mission. After the main campaign, weapon choice becomes less restricted, making experimentation much easier.
Verified structure
Classes in Orcs Must Die! 3 are really hero roles
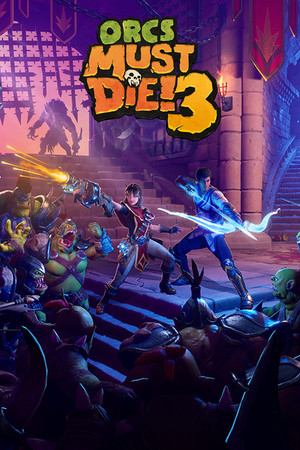
There are six playable characters: Egan, Kelsey, Cygnus, Vorwick, Gabriella and Max. The game does not use a conventional class system with selectable talent trees such as tank, healer or rogue. Instead, each War Mage has a weapon identity, a unique ability, different base health and mana, and hero-specific upgrades in the Spellbook.
That means the practical classes are player-made roles. A high-health hero can hold a dangerous lane, a high-mana hero can cast more often, and a control-focused hero can stop leaks before they reach the Rift. The official FAQ confirms the six-character roster, while the community reference lists the comparative base stats and unique abilities.
- Egan: Ground Slam knocks back and stuns nearby enemies. He suits a control or beginner build.
- Kelsey: Levitate lets her hover and reposition in the air. She has high health and works well in aggressive frontline setups.
- Cygnus: Play Dead makes enemies ignore him while he heals. His high mana favors weapon abilities and repeated casting.
- Vorwick: Teleport gives him a direct escape and gap-closing tool. He has the highest listed base health and the lowest listed base mana.
- Gabriella: Feather Fall slows her descent and helps with vertical movement. Her balanced health and mana make her flexible.
- Max: Double Jump improves mobility around barricades, pits and elevated firing positions.
| Hero | Base health | Base mana | Practical role |
|---|---|---|---|
| Egan | 135 | 165 | Crowd control and spell support |
| Kelsey | 175 | 125 | Durable melee pressure |
| Cygnus | 125 | 175 | Mana-heavy ranged damage |
| Vorwick | 185 | 115 | Frontline survival |
| Gabriella | 150 | 150 | Flexible positioning |
| Max | 165 | 135 | Mobile generalist |
The roster and the six listed ability names are documented facts. The role descriptions are recommendations based on those mechanics, not official class labels.
Build route 1
Safe control build for new players
Choose Egan when you want a forgiving first build. Ground Slam gives you an emergency button when a group reaches the barricade, while his relatively high mana pool supports frequent weapon abilities. Do not treat the ability as your main source of damage. Its value is buying time for traps and separating dangerous enemies from the pack.
Start with a weapon that is comfortable against normal orcs at medium range. Add barricades to create a short route, then place your damage traps where enemies must slow down or turn. A stun, freeze or knockback option is more valuable here than a second trap that only adds raw damage. The goal is to interrupt the wave, not to duel every enemy.
Spend early skulls on universal attack or survivability improvements only after upgrading the traps that appear in nearly every mission. Permanent trap improvements are generally more reliable than trying to force a narrow hero-specific setup before you understand the map.
- Use Egan’s Ground Slam when a heavy unit reaches your kill zone or when several enemies bypass your first control layer.
- Pair barricades with a concentrated damage lane instead of scattering traps across every available tile.
- Keep one flexible slot for the map’s special threat, such as flyers, sappers or armored enemies.
Build route 2
Melee build for Kelsey or Vorwick
For an Orcs Must Die! 3 melee build, Kelsey is usually the easier transition because her higher health gives you more room to fight near traps. Vorwick is the sturdier alternative when surviving direct hits matters more than frequent ability use. Both builds should still rely on the defense layout; melee is a way to finish, stagger and redirect enemies, not a reason to abandon barricades.
Take a weapon with dependable close-range damage and a secondary effect that controls crowds. A melee weapon that can stagger, knock back or clear a cone is more useful than one that only performs well against a single target. Bring a mana-supporting trinket if your weapon’s secondary attack is central to the build.
Your trap bar should cover three jobs: a cheap way to damage groups, a control effect that stops a rush, and a durable answer to bosses or heavy units. Place yourself just behind the trap line. That position lets you punish survivors without becoming the only thing holding the lane together.
- Use Kelsey when you expect sustained contact and want more health.
- Use Vorwick when the map forces dangerous rotations or repeated escapes.
- Do not spend every mana point immediately; reserve enough for an emergency weapon ability or mobility action.
- In co-op, let the melee player hold a breach while the second player maintains the main kill zone.
The recommendation follows the verified health and mana differences, but exact weapon damage and trap rankings can change after balance updates. Test the setup on the specific map rather than treating it as a universal tier list.
Build route 3
Caster, mobility and support routes
Cygnus is the clearest caster choice because his listed base mana is the highest. Build around a weapon with a useful secondary ability, then choose a trinket that improves mana economy, cooldown access or emergency defense. His Play Dead ability is strongest when used to reset a dangerous situation, heal safely or buy time for a Rift-side defense. It is not a substitute for repairing a broken route.
Gabriella and Max are flexible picks when the map rewards movement. Feather Fall helps Gabriella manage vertical spaces and drops, while Max’s Double Jump makes elevated firing positions and escape routes easier to use. Their balanced statistics make them good choices when you do not yet know which threat the map will emphasize.
A support route does not mean dealing no damage. Bring at least one direct-damage weapon or trap, then use movement and utility to keep the defense stable. In co-op, the best support player is the one who covers a missing function, such as anti-air, crowd control or boss damage.
- Cygnus: prioritize mana-efficient casting and ranged damage.
- Gabriella: prioritize safe positioning and flexible trap coverage.
- Max: prioritize mobility, reliable all-purpose damage and a simple defensive layout.
Practical setup
How to change your hero and loadout
Open the Spellbook from the level-selection or preparation screen, then choose the Heroes, Weapons, Trinkets or Traps category. Select the replacement item and place it into the corresponding loadout slot. You can also edit the setup at the start of a mission before launching the next wave. The exact button prompt differs between PC, Xbox and PlayStation.
During the early campaign, some players may find that the first weapon is tied to the selected character or that alternative weapons are not yet available. Community reports consistently place full hero-and-weapon freedom after completing the main campaign. If a weapon slot appears locked, progress the campaign rather than assuming the save is broken.
A practical ten-slot setup is usually one primary weapon, one secondary weapon or trinket, barricades, and several traps that cover damage, control and special enemies. Avoid filling every slot with the same damage type. A build that kills ordinary orcs quickly can still fail if it has no answer to flyers, sappers, armored units or bosses.
- Change the hero in the Spellbook before entering the map.
- Edit traps and trinkets during mission preparation.
- Replace, rather than merely buy, an existing slot item when building a new loadout.
- If a weapon cannot be changed, check whether the campaign has been completed on that save.
- Save one general-purpose loadout and create specialized versions for difficult maps.
The publisher’s public OMD3 FAQ confirms the character count but does not document every current menu prompt or unlock condition. The Spellbook workflow and post-campaign weapon freedom are supported by community references and player reports, so platform-specific differences are possible.
FAQ
Common questions
What are the Orcs Must Die! 3 classes?
There are no formal classes. The six heroes create practical roles through different health, mana, weapons and unique abilities. Egan is a control pick, Cygnus is a caster, Kelsey and Vorwick suit frontline play, and Gabriella and Max are flexible mobility options.
Which hero is best for beginners?
Egan is the safest recommendation because Ground Slam can interrupt a dangerous group and his mana pool supports frequent ability use. Kelsey is another forgiving choice if you prefer fighting closer to the trap line.
What are the Orcs Must Die! 3 character stats?
The commonly referenced base values are 125 to 185 health and 115 to 175 mana, depending on the hero. Vorwick has the highest listed health, while Cygnus has the highest listed mana. These numbers describe starting stats before upgrades.
How do I make a melee build?
Choose Kelsey or Vorwick, use a close-range weapon with crowd control, place barricades to create a short kill lane, and reserve mana for an emergency ability. Add at least one trap that handles groups and another that answers heavy enemies.
How do I change my loadout?
Use the Spellbook before a mission and open the hero, weapon, trinket or trap category. Select the item you want and replace the relevant slot. You can also edit the loadout during the mission preparation phase before starting the next wave.
Sources
What we checked
Official listings establish current availability and product facts. Community pages are used for mechanics and build history, then labeled separately.
- OfficialRobot Entertainment: Orcs Must Die! 3 FAQ
- OfficialRobot Entertainment: Orcs Must Die! 3 news and patch archive
- CommunityOrcs Must Die! Wiki: Heroes category and base stats
- ReferenceLast Word on Gaming: character health, mana and abilities reference
- CommunityOrcs Must Die! Wiki: Spellbook and loadout management