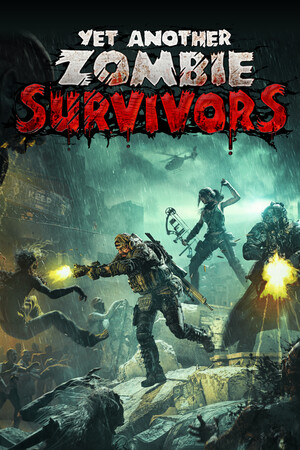
The game does not publish an official damage-based tier list. The rankings below are practical recommendations based on verified survivor roles, leader-perk behavior, known mode objectives, and build consistency rather than an official DPS ranking.
Fast answer
The answer before the background
For most players, start with SWAT for a balanced, reliable run or Tank when you need extra forgiveness and wide-area damage. Ranger is the best support-oriented leader once unlocked, especially for teams that can exploit critical hits and Luck. Ghost and Huntress are stronger specialist choices for damage-focused squads, while Engineer is the better control pick for dangerous crowds. Medic is the safest sustain option, but it usually trades clear speed for stability. In Boss Rush, favor SWAT, Ghost, Huntress, or Ranger over a purely defensive leader; in Bio Lab and other difficult stages, Tank, Medic, Engineer, and Ranger gain value because survival and control matter more.
Direct comparison
Character tier list for practical play
Treat this as a squad-building tier list rather than a one-character power chart. A run can contain up to three survivors, but the selected leader provides the full value of their leader perk while rescued survivors provide a reduced value. That makes the same survivor excellent as a leader in one team and merely useful as a recruit in another.
The top tier below means consistent value across several situations. A lower placement does not mean the survivor is weak; it usually means the character needs a narrower build, more permanent progression, or a better partner.
- S tier: SWAT, Tank, Ranger. These are the best first choices for reliable progress, although Ranger is more demanding until her kit and unlock path are established.
- A tier: Ghost, Huntress, Engineer. Each can be outstanding when the squad supports its damage, critical, melee, or control plan.
- B tier: Medic, Pyro, Mechanic. These survivors are valuable specialists, but their best results depend more heavily on stage threats, elemental choices, or compatible weapons.
| Survivor | Best role | Why choose them | Main limitation |
|---|---|---|---|
| SWAT | General damage and wave clear | Reliable ranged pressure and a forgiving upgrade path. | Less specialized than the best late-game damage or support leaders. |
| Tank | Early safety and area damage | Good choice when enemies surround the squad or mistakes are costly. | Can feel slower when a stage rewards rapid boss damage. |
| Ranger | Team support and critical builds | Boosts squad Critical and Luck stats, provides healing options, and introduces fear. | Late unlock and more demanding to optimize. |
| Ghost | Melee and high-risk damage | Strong close-range pressure and good payoff for aggressive movement. | Requires better positioning and defensive planning. |
| Huntress | Focused ranged and critical damage | A strong fit for elite and boss-focused builds. | More dependent on good critical and weapon upgrades. |
| Engineer | Crowd control and defensive zones | Turrets, electric effects, and control tools can stabilize crowded stages. | Damage can lag if the run does not offer the right ability upgrades. |
| Medic | Healing and sustain | Excellent when attrition, mistakes, or long runs are the main problem. | Usually slower at ending bosses than a dedicated damage leader. |
| Pyro | Elemental and area damage | Strong when fire and other elemental effects are supported by the run. | Less consistent when the offered upgrades do not match the plan. |
| Mechanic | Gadget and team utility | Improves gadget-oriented squads and can support unusual ability combinations. | Its value is harder to realize without suitable weapons and abilities. |
The official materials describe survivor roles and major features, but they do not provide a developer-maintained tier list or universal damage table. The tier labels are therefore editorial recommendations, not fixed game statistics.
Mode and stage picks
Best choices for each mode
For standard survival runs, SWAT is the safest starting point because it supplies dependable damage without asking the player to force a narrow build. Tank is the better choice when the current stage is punishing close movement, has dense waves, or you are still developing permanent upgrades. Use the other two squad slots to add healing, control, or a complementary damage type rather than duplicating the same weakness.
Boss Rush changes the priority. The mode gives you until the tenth minute to become powerful before the final boss appears, and faster kills improve leaderboard placement. That favors SWAT for consistent ranged output, Ghost or Huntress for specialist damage, and Ranger when her critical and Luck support improves the whole team. Medic and Engineer remain valid for learning the mode, but they are usually choices for survival rather than speed.
Bio Lab is a circular arena bordered by toxic fumes, with a decontamination process that can force movement and punish getting trapped. Tank, Medic, Engineer, and Ranger are the most forgiving choices here because armor, healing, control, and squad support reduce the cost of positioning errors. For experienced players chasing fast clears, SWAT, Huntress, or Ghost can outperform them if the build has enough area coverage and boss damage.
Infinite mode favors sustained control and recovery more than a short burst window. Start with Tank, Ranger, Medic, or Engineer if the aim is to establish a stable run. Once permanent bonuses are strong, shift toward Ranger-supported critical teams or a Ghost-led damage build if you can keep the squad safe.
- Best general stage opener: SWAT.
- Best difficult-stage safety pick: Tank.
- Best support leader for an established roster: Ranger.
- Best learning pick for Bio Lab or long runs: Medic or Engineer.
- Best leaderboard-oriented Boss Rush core: SWAT, Huntress, Ghost, or Ranger.
| Goal | Recommended leader | Useful partners | Reason |
|---|---|---|---|
| Fast general clear | SWAT | Ranger plus Huntress or Ghost | Combines dependable ranged damage with critical and Luck support. |
| Safest first wins | Tank | Medic plus Engineer | Adds durability, healing, and crowd control. |
| Boss Rush speed | SWAT or Huntress | Ranger plus Ghost | Prioritizes focused damage while preserving critical support. |
| Bio Lab consistency | Tank or Ranger | Medic plus Engineer | Helps the squad survive forced movement and dangerous crowding. |
| Infinite survival | Ranger or Tank | Medic plus Engineer | Sustained healing, control, and defensive value matter over time. |
| Elemental experiment | Pyro or Mechanic | Engineer plus Ranger | Supports ability or gadget themes while retaining utility. |
Exact rankings can change when the developer adjusts enemy behavior, weapon evolution, or the upgrade pool. The 1.0.1 series mainly added quality-of-life changes and fixes, but future balance patches may move specialist survivors.
Practical route
How to choose your squad in a run
First, decide whether the run is about clearing waves, killing bosses, surviving a difficult arena, or testing a theme. Then choose the leader whose full perk directly supports that goal. Do not select a recruit only because its individual description sounds powerful; the reduced recruit perk and the available weapon evolutions matter more than a simple tier label.
Second, cover the squad’s biggest weakness. A damage leader usually wants either control or sustain. A defensive leader needs a way to finish elites and bosses before the stage becomes overwhelming. Ranger is especially attractive when the other two survivors already benefit from critical hits or Luck, while Medic is more valuable when damage is adequate but mistakes are ending runs.
Third, commit to the upgrades that the offered choices actually support. Do not force a perfect internet build if the run is repeatedly offering another damage type or ability family. The strongest practical team is often the one that reaches useful evolutions early, not the one with the highest theoretical ceiling.
Finally, remember that survivor ranks and permanent progression affect the comparison. A newly unlocked specialist may look worse than SWAT simply because the generalist is better developed. Re-test a character after improving its rank, skill tree, and permanent bonuses.
- Use SWAT or Tank while learning a new map or mode.
- Rescue Medic or Engineer when the run is losing to damage taken rather than insufficient damage.
- Choose Ranger when at least one other survivor benefits from critical or Luck scaling.
- Take Ghost or Huntress when the run already has a reliable defensive answer.
- Keep Pyro and Mechanic for runs where the weapon and ability offers clearly support them.
Common questions
Frequently asked questions
FAQ
Common questions
Who is the best character for beginners?
SWAT is the best all-purpose beginner choice because it offers reliable damage without demanding a specialized strategy. Tank is the better beginner pick if you are regularly dying to crowds or contact damage.
Is Ranger the strongest survivor?
Ranger is the strongest support-oriented choice once unlocked, not an automatic winner in every run. Her value rises sharply when the other survivors use critical hits or when the squad needs Luck and healing. She also has a steeper learning curve than SWAT or Tank.
Which survivor is best for Boss Rush?
SWAT is the most reliable starting recommendation. Huntress and Ghost can offer higher specialist damage, while Ranger can improve a critical-focused squad. Pick Medic or Engineer when the immediate problem is surviving long enough to reach the final boss.
Should I use a tier list for recruits as well as leaders?
Use it cautiously. The leader receives the full leader-perk value, while rescued survivors provide a reduced value. A survivor can therefore be a top-tier leader but only an average recruit unless its weapons, abilities, or squad synergy are especially useful.
Are older character rankings still accurate?
Treat pre-1.0 rankings as historical. Version 1.0 added Ranger, Bio Lab, Boss Rush, and other systems, while later 1.0.1 hotfixes changed Luck behavior and fixed survivor-related issues. Always compare the guide’s version scope with your installed build.
Sources
What we checked
Official listings establish current availability and product facts. Community pages are used for mechanics and build history, then labeled separately.
- OfficialOfficial Steam announcements: version 1.0.1, 1.0.1a, and 1.0.1b changes
- ReferenceOfficial Yet Another Zombie Wiki: survivor rules, leader perks, and roster
- ReferenceOfficial Yet Another Zombie Wiki: survivor statistics categories
- CommunitySteam community guide: Version 1.0 survivor synergy reference