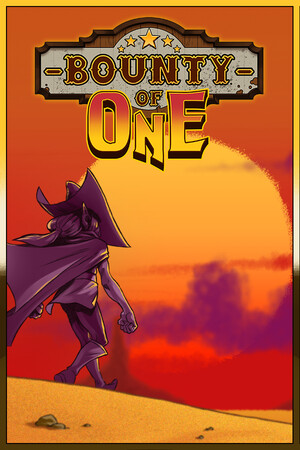
This guide discusses boss encounters, escalating difficulty and progression unlocks. It does not list unverified drop rates or fixed wave tables.
Fast answer
The answer before the background
Bounty of One has three timed run sections, not a conventional chapter-select campaign. Enemy waves grow more dangerous inside each section, and a boss gate appears at the end of each one. The third section ends with The Undertaker in a standard run. The normal Infamy ladder reaches level 10; after that, the Necromancer’s Pact allows progression up to Infamy 50 by adding challenge modifiers. Your Infamy rises after a successful run, not from reaching a kill or time threshold during the current run. Exact wave counts, boss order and enemy mixtures can differ by mode, so use the section timer and boss transition as the reliable progression markers.
Run structure
How stages and chapters actually work
The game does not present a long story campaign divided into selectable chapters. Its main progression is run-based: you enter a battlefield, survive escalating enemy waves, collect coins and upgrades, defeat section bosses, and continue toward The Undertaker.
For practical purposes, think of one standard run as three acts or stages. The developer’s Undertaker update changed the earlier two-part structure into three parts and set the run’s non-boss combat time at about 20 minutes. That means the most useful map question is not which chapter you are on, but which section of the current run you have reached.
The story framing remains focused on Greenhill, its sheriffs and deputies, and the Undertaker. However, the public documentation does not establish a separate chapter list, a campaign map selector or a fixed story route beyond the standard run structure.
- Part one is the early survival and build-building section.
- Part two increases pressure and introduces a broader threat mix.
- Part three is the final regular combat section before The Undertaker.
- Boss fights are progression gates between sections, not optional side rooms in the standard run.
| Progress point | What to expect | Practical goal |
|---|---|---|
| Start of run | Basic enemies, coins and early level-ups | Stabilize damage and movement before the screen fills. |
| End of part one | First boss encounter | Keep a dash available and take the reward safely. |
| End of part two | Second boss encounter | Enter with enough damage to avoid being overwhelmed by later waves. |
| End of part three | The Undertaker, the standard finale | Prioritize survival and consistent damage over risky pickups. |
The three-part structure and approximate combat duration are developer-documented. The labels early, middle and late are practical descriptions, not official chapter names.
Waves
What changes as a run advances
Enemy waves are continuous rather than presented as a numbered list of discrete stages. New enemies and stronger variants appear as the run progresses, while the number of threats on screen and the pressure on your movement increase. The Steam store describes the core loop as defeating endless waves, elites and bosses, so there is no verified universal wave count that applies to every mode.
The developer’s structural update documented an enemy split across the three parts. Goblins, Mages and Golems were assigned to the first half of the run, while Batmen, Orcs and Ilithids were assigned to the latter half. This is useful as a broad progression guide, but it should not be treated as a complete current spawn table for every mode or downloadable-content configuration.
A wave is effectively cleared by surviving its pressure, collecting enough coins to level, and reaching the next boss transition. Do not wait for every enemy to disappear before moving. Your build should keep killing while you reposition, especially when ranged attacks or chargers begin to close off safe space.
- Remove ranged threats when they create overlapping projectile lanes.
- Move before chargers reach their attack range instead of finishing a low-health target.
- Collect coins when the route is safe; falling behind on upgrades makes later waves much harder.
- Treat stronger deputies and elites as priority targets when they can trap your movement.
- Do not assume that an enemy appearing in one part is guaranteed in every mode or run.
| Wave pressure | Recommended response | Common mistake |
|---|---|---|
| Low pressure | Secure coins and choose a coherent damage plan. | Spending all mobility for small targets. |
| Mixed enemies | Keep a wide movement loop and clear ranged threats. | Kiting through unopened space until attacks overlap. |
| Elite or deputy pressure | Use burst damage while preserving an escape route. | Standing still to finish one target. |
| Pre-boss pressure | Enter the transition with dash capacity and a clear arena. | Taking a dangerous pickup just before the boss gate. |
Public sources support escalating waves and a broad enemy distribution, but they do not provide a dependable current table of wave numbers, exact timings or spawn percentages.
Infamy progression
The level ladder and maximum difficulty
Infamy is the game’s persistent difficulty progression. It is not a live meter that rises because you kill enough enemies during a run. The developer explicitly clarified that Infamy increases when you win a game, and the current level can be viewed from the character-select menu.
The normal experience runs through Infamy 10. At that point, the Necromancer’s Pact becomes the important progression gate. It lets you add challenge effects and climb beyond the old standard ceiling, with the full-release system extending the available ladder to Infamy 50.
This makes Infamy 10 a major milestone rather than the final difficulty. Infamy 11 and above are not simply more enemies in the old format; they involve Pact choices that can alter enemy durability, projectiles and other parts of the run. The exact modifiers offered depend on the Pact interface and should be read in-game before confirming a high-level attempt.
- Use lower Infamy while learning a character, boss or new item pool.
- Raise the setting after you can reliably finish the standard run rather than after one lucky clear.
- Expect Infamy 10 to be a meaningful difficulty checkpoint.
- Treat Infamy 50 as the maximum progression target, not a normal beginner objective.
- Remember that a successful clear is what advances persistent Infamy.
| Range | Progression meaning | Best use |
|---|---|---|
| Early Infamy | Standard difficulty increases and more demanding waves | Learning characters, bosses and core builds. |
| Infamy 10 | Major gate into Pact-based difficulty | Testing whether your build survives the standard ceiling. |
| Infamy 11–49 | Pact modifiers create customized high difficulty | Choosing challenges that match your build and skill. |
| Infamy 50 | Top documented Infamy target | Endgame challenge and mastery attempts. |
The current full-release documentation supports Infamy 50 as the maximum. Older guides may say 18 because that was the previous system before the full release.
Unlock gates
What to do at each progression checkpoint
The most useful progression gates are tied to successful clears, not to reaching a particular wave number. Winning at progressively higher Infamy unlocks more of the game’s long-term challenge and economy systems.
The developer’s full-release notes describe the Necromancer’s Pact as replacing the old Infamy progression after level 10. A developer discussion also states that the Super Black Market becomes available after beating the game at an Infamy higher than 10. Because the wording is important, treat a clear above 10 as the safe requirement rather than assuming that merely selecting 11 is enough.
Some older community references mention other mode gates, including Daily Struggle at Infamy 5. That requirement is not supported here by a current official page, so confirm the in-game unlock text before relying on it. This is an example of why older progression guides can conflict with the full-release system.
- Clear the run at the current setting to advance persistent Infamy.
- Reach the Infamy 10 checkpoint to access Pact-based progression.
- Win above Infamy 10 to safely target the Super Black Market gate.
- Use the in-game encyclopedia and unlock screens for character- or item-specific requirements.
- If a mode is missing, check its current menu description instead of assuming an old Infamy requirement.
| Gate | Reliable requirement | Confidence |
|---|---|---|
| Higher Infamy | Win a run; the developer confirms Infamy rises after victory. | Verified. |
| Necromancer’s Pact | Progress through the standard ladder to the post-10 system. | Verified by full-release documentation. |
| Super Black Market | Beat the game at an Infamy higher than 10. | Developer-confirmed in a Steam discussion. |
| Older mode requirements | May be listed differently in older guides. | Check in-game; not treated as current here. |
The old maximum of 18 belongs to the pre-full-release Infamy system. Current guidance should use the Pact-based maximum of 50.
Practical route
A reliable way to progress through the stages
For a first clear, build for consistency rather than a perfect late-game combination. Take early damage or attack-speed upgrades when your starting weapon is struggling, but preserve enough movement and dash capacity to survive boss transitions.
During the first part, prioritize a reliable way to clear clustered enemies and collect coins without crossing dangerous lanes. In the second part, add area coverage or defensive mobility if ranged enemies and elites are limiting your route. Before the final part, stop taking unnecessary risks for marginal upgrades; a living build with slightly less damage is better than a stronger build that has no escape option.
At each boss gate, clear nearby threats before chasing rewards. The store and developer materials confirm that bosses and elites provide valuable loot, but public sources do not establish a guaranteed unique item or fixed drop table for every boss. Treat the reward as an opportunity, not a reason to ignore the arena.
- Choose a damage plan by the first boss instead of taking unrelated upgrades.
- Keep at least one dash or equivalent escape option for boss patterns.
- Clear ranged enemies before they create crossfire around an elite.
- Use movement to create firing windows because standing still is usually temporary, not permanent.
- Raise Infamy one successful step at a time and record which Pact effects caused your build to fail.
| If you are failing at… | Try changing… | Why it helps |
|---|---|---|
| The first boss | Early damage, attack speed or area coverage | A weak early clear delays every later upgrade. |
| Mid-run surrounds | Movement speed, dash recovery or area damage | You need space as much as raw damage. |
| Ranged crossfire | Target priority and route width | Removing one projectile source can reopen the arena. |
| High Infamy | Pact selection and defensive margin | Not every modifier suits every weapon or character. |
These build priorities are practical recommendations. They are not official character-specific requirements, and different weapons can justify different choices.
FAQ
Common questions
What is the maximum Infamy in Bounty of One?
The full-release system supports Infamy 50. Infamy 10 is the important transition point; after it, the Necromancer’s Pact supplies additional challenge modifiers for the higher levels.
Does Infamy increase during a run?
No. The developer states that Infamy increases when you win a game. Kills and level-ups improve the current run, but they do not directly raise your persistent Infamy before the results screen.
How many chapters or stages are in a standard run?
A standard run has three timed parts or acts, followed by boss transitions. The game does not publicly document a separate selectable chapter campaign, so “three stages” is the most useful way to describe the run structure.
Are the enemy waves fixed?
Not in a publicly verified universal table. The broad enemy distribution between early and later sections is documented, but exact wave counts, timings and mode-specific spawns can vary.
What unlocks after Infamy 10?
The Necromancer’s Pact becomes the post-10 progression system. The developer also states that the Super Black Market is unlocked by beating the game at an Infamy higher than 10, so a clear above 10 is the safest target.
Sources
What we checked
Official listings establish current availability and product facts. Community pages are used for mechanics and build history, then labeled separately.
- OfficialOfficial Steam store page for Bounty of One
- OfficialDeveloper announcement: The Undertaker and the three-part run structure
- OfficialDeveloper announcement: full release and Infamy 50
- OfficialDeveloper discussion: Infamy, the Necromancer’s Pact and Super Black Market
- ReferenceQuest Meridian boss and run-structure reference