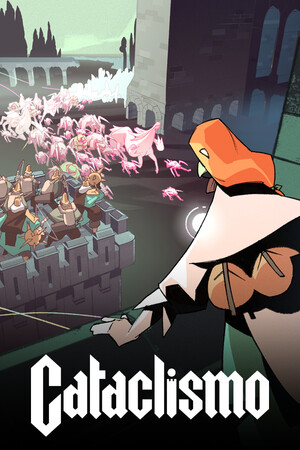
Recommendations are strategy advice, not mandatory builds. Survival mode differs from Campaign and Skirmish because progression and Military Capacity use points rather than the same Citadel improvement route. Difficulty also changes unit health, Horror health and maintenance costs.
Fast answer
The answer before the background
For most campaign, skirmish and city-building missions, use a ranged-control build: establish a Barracks, field Bowmen and Lobbers, unlock Prosperity II, add Captors and windows, then rush Prosperity III for the Bomber's Workshop and Cannoneers. Put Bowmen and later Ballistas on high, protected firing positions; keep Lobbers, Captors and Cannoneers low behind windows or stone cover. Build a narrow, supported bridge only to cross a gap or connect towers, and never treat it as a defensive platform because units cannot stand on bridges. In the Book of Insight, take early Bowman or Lobber skills for immediate value, then Cannoneer's Volatile Cannonball once Cannoneers become part of the plan.
VERIFIED BASICS
Cataclismo’s practical classes and roles
Cataclismo does not use a conventional hero-class system. Its build choices are made through units, their building upgrades, Book of Insight skills and permanent mission improvements. Every trainable unit has one upgrade in its recruitment building and one skill in the Book of Insight. Units also gain experience from attacks; Veterans receive +20% attack damage and -15% attack cooldown.
Treat the roster as five practical classes: Bowmen for dependable high-ground single-target fire, Lobbers for low-height area damage, Captors for slowing and control, Cannoneers and Ballistas for siege artillery, and Hunters or Partisans for late-game specialist damage. This role-based approach is more useful than looking for a single strongest unit, because terrain, enemy density and the mission type change the value of each unit.
- Bowman: high preferred height, 12 damage, 11 range and a 2.8-second cooldown in the official reference.
- Lobber: low preferred height, area 2, 7 range and strong early access to splash damage.
- Captor: low preferred height, area 2 and a slowing attack; the slow is stronger when the Captor is within 5 metres.
- Cannoneer: low preferred height, 20 damage, area 9, 11 range and a 4.5-second cooldown.
- Ballista: high preferred height, 32 damage, 16 range and a long line attack.
- Hunter: very high preferred height, 40 damage and 16 range; Partisan is a durable specialist that changes behaviour by height.
| Role | Best use | Main limitation |
|---|---|---|
| Bowman | High-wall damage and finishing ordinary Horrors | Needs height and protection |
| Lobber | Early splash against packed waves | Short range and low direct damage |
| Captor | Slow-heavy control and setup for artillery | Low damage without supporting fire |
| Cannoneer | Large-area damage against clusters | Slow attack cycle and Prosperity III requirement |
| Ballista | Long lanes and high-priority targets | Expensive and arrives at Prosperity IV |
| Hunter / Partisan | Late-game specialist damage | High resource and population demands |
This guide calls these roles “classes” for readability, but the game’s actual systems are units, buildings, improvements and Book of Insight skills.
RECOMMENDED ROUTE
The safest all-round Cataclismo build order
This route is a recommendation based on the published unlock order and unit statistics, not an official developer-prescribed build. It works best when you need a stable defence before committing to expensive artillery. Prosperity II unlocks Captors, the Masonry Guild, windows and bridges; Prosperity III unlocks Cannoneers, the Bomber’s Workshop and several economy tools; Prosperity IV adds Ballistas, Hunters and Partisans.
- 1. Secure production first. Start with the Citadel’s oxygen economy, then place a Barracks and enough basic housing and air production to keep citizens and oxygen positive.
- 2. Build a compact first defence. Use stone at the base, leave room for windows and make the main firing wall at least deep enough to keep units behind cover. Do not build a tall unsupported tower just to gain range.
- 3. Train a mixed opening force. Use Bowmen for high targets and Lobbers for low, clustered enemies. Add Captors when fast Horrors or large groups begin reaching the wall.
- 4. Reach Prosperity II before overbuilding. Windows improve the range of units behind them, while bridges solve movement across gaps but cannot hold stationed units.
- 5. Transition at Prosperity III. Construct the Bomber’s Workshop only when your oxygen, minerals and citizens can support it. Add Cannoneers behind windows, with a clear lane and enough wall depth to prevent a single breach from exposing the whole battery.
- 6. Finish with a specialist branch. At Prosperity IV, choose Ballistas for long straight approaches, Hunters for high-priority or weakened targets, or Partisans when you need a tougher flexible unit.
- 7. Recycle temporary structures. Buildings and pieces can be recycled for resources, so remove early scaffolding or redundant walls once the permanent fortress is safe.
| Stage | Priority | Avoid |
|---|---|---|
| Early | Barracks, Bowmen, Lobbers, oxygen and support | Overproducing units before maintenance is stable |
| Prosperity II | Captors, windows, Masonry Guild and bridge access | Placing troops on bridges |
| Prosperity III | Bomber’s Workshop and Cannoneers | Rushing artillery with no mineral or oxygen buffer |
| Prosperity IV | Ballista, Hunter or Partisan specialization | Unlocking every elite option at once |
It gives you useful ranged damage immediately, adds control before the first expensive artillery jump, and preserves enough structural and economic capacity to support late-game units.
STRUCTURE GUIDE
How to build a bridge and a firing fortress
For a reliable bridge, first identify the two pieces of ground you are connecting. Build support from the near side, extend the crossing with wood pieces where possible, and make sure the landing connects back to a valid path. Bridges are designed to cross gaps easily, but the official reference explicitly says units cannot be stationed on them.
Use bridges as logistics: move Iris and troops across them, reach an outpost, or connect a forward tower to the main settlement. If a bridge is exposed, protect both ends with walls or firing positions rather than trying to turn the span into a firing line.
- Use stone for the load-bearing base and critical walls. Wood uses less support but has minimal health, making it better for travel and temporary access.
- Check support before removing or recycling a lower piece. If the support disappears, higher pieces, units and buildings may collapse; a unit falling into the Mist is killed instantly.
- Use height deliberately. Bowmen, Ballistas and Hunters prefer high positions; Lobbers, Captors and Cannoneers prefer low positions according to the official unit reference.
- Place windows in front of low-height units and merlons where they improve the range of units behind them. Keep artillery lanes clear so splash attacks do not waste shots on nearby walls.
- Use banners beside the units you expect to keep attacking. A normal Banner increases adjacent units’ attack damage by 25%; the Grand Banner later increases it by 50%. Specialist boosts affect basic attacks, not unit skills.
| Defence layer | Recommended contents | Purpose |
|---|---|---|
| Outer approach | Spikes, decoys later, narrow entrances | Delay and concentrate Horrors |
| Main wall | Stone, windows, merlons and doors | Protect the first firing line |
| Low firing deck | Lobbers, Captors and Cannoneers | Splash damage and control |
| High firing deck | Bowmen, Ballistas and Hunters | Range, line attacks and finishing damage |
| Rear reserve | Partisans or spare ranged units | Recover a breach or cover another lane |
A taller wall is not automatically a stronger wall. Stone toughness improves when enough stone pieces are stacked above or below a column, and the health multiplier varies by difficulty. Build continuous, supported columns before adding extra height.
SKILLS AND STATS
Best Book of Insight choices for each route
The Book of Insight skills can be refunded, which makes experimentation safe between Campaign missions. Level II skills require the Prodigy expedition level and Level III skills require Master; the official list identifies the unit effects below.
- General opening: Menelaus Shot gives Bowmen three targets, while Powder Ball increases Lobber impact area. Choose between them according to whether your early threat is spread-out or clustered.
- Control route: Pearl Web lets Captors stun Horrors. Take it when slowing alone is not enough to hold a choke point.
- Cannoneer route: Volatile Cannonball increases the Cannoneer’s attack area. Pair it with the Bomber’s Workshop’s Refined Powder improvement, which further increases Cannoneer area of effect.
- Artillery route: Cluster Bomb expands Ballista area of effect, making it attractive on long lanes with repeated groups rather than scattered targets.
- Elite route: Execution lets Hunters instantly kill low-health enemies, while Mistfuel Grenade gives Partisans a secondary area attack that removes Enamel.
- Defensive route: Reinforced Stonework increases Citadel health, and Headquarters Defense adds a damage field around the Citadel. These are safer choices when a mission’s objective is survival rather than map control.
| Build goal | First skill priority | Follow-up improvement |
|---|---|---|
| Early general defence | Menelaus Shot or Powder Ball | Barracks range or damage improvement |
| Crowd control | Pearl Web | Weighted Net for more Captor targets |
| Cannoneer battery | Volatile Cannonball | Refined Powder |
| Long firing lane | Cluster Bomb | Ballistae Overhaul |
| Elite finisher | Execution | Wax-Treated Hoods for Hunter damage and range |
For units, compare attack area, range, cooldown, preferred height, health, cost and maintenance—not damage alone. For the fortress, support, stone toughness, wall depth and protected access are the decisive defensive stats.
LIMITS AND VARIANTS
When to change the standard build
In Wetlands, shelter matters because rain can make units miss; in Depths, sight range is greatly reduced. Survival also uses a different unlock structure, with progression and Military Capacity purchased using points. These mode differences are verified in the official game-mode reference.
On Wetlands, favour roofed firing positions and do not rely on exposed high towers. In Depths, spend more on lanterns, compact overlapping walls and short-range control. In Survival, treat the opening as a progression race: unlock the units and capacity that match the map rather than copying a Campaign research order.
If your first wall is holding comfortably, delay elite units and improve economy or capacity. If Horrors are reaching the wall in numbers, add Captors before replacing your whole army with expensive Cannoneers. If the attack approaches through one long corridor, Ballistas become more attractive than a second Cannoneer line.
- Use Bowmen-heavy openings against high or fragile targets.
- Use Lobbers and Captors against dense low-height waves.
- Use Cannoneers where several Horrors overlap and can be hit by the same area attack.
- Use Ballistas on long, unobstructed approaches.
- Use Hunters to finish weakened threats and Partisans when armour removal or durability is more important than range.
FAQ
Common questions
What is the best Cataclismo build for beginners?
Use Barracks units first: Bowmen for range, Lobbers for splash and Captors for slowing. Reach Prosperity II for windows, then Prosperity III for Cannoneers. This is more forgiving than rushing elite units because it establishes damage, control and a protected fortress before the expensive transition.
How do you build a bridge in Cataclismo?
Use supported wood or stone pieces to connect two landings, then confirm that the route links back to the Citadel or another functioning settlement path. Bridges are movement structures; units cannot be stationed on them, so place defensive units at either end or on nearby towers.
How do you build a Cannoneer?
Reach Prosperity III, build the Bomber’s Workshop, and meet its published cost of 680 Oxygen, 240 Wood, 40 Minerals, 18 Citizens and 2 Mistfuel. It trains Cannoneers and Ballistas, but the building also has significant oxygen maintenance, so stabilize your economy first.
How do you build a Cannoneer-focused fortress?
Place Cannoneers on a low firing deck behind windows, keep several tiles of wall depth between them and the approach, and give them a clear splash-damage lane. Unlock Volatile Cannonball and buy Refined Powder when the mission is long enough to repay the investment.
Should Cannoneers or Ballistas be the main artillery unit?
Cannoneers are the safer general choice against clustered waves because they use area damage. Ballistas are better when the approach is long and straight, since their attacks travel in a line and have 16 range. The best late-game fortress often uses Cannoneers for the choke and Ballistas for the lane beyond it.
Sources
What we checked
Official listings establish current availability and product facts. Community pages are used for mechanics and build history, then labeled separately.