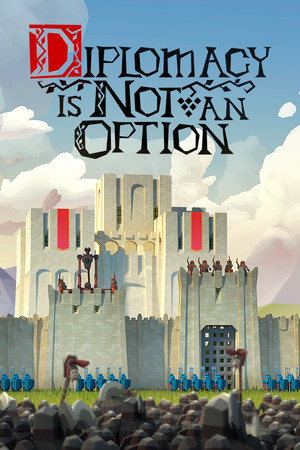
The rankings below combine verified unit and building descriptions with clearly labeled strategic recommendations. Community testing is useful for practical placement advice, but it is not an official balance statement.
Fast answer
The answer before the background
For most defensive maps, build a layered wall with Crossbowmen for flexible damage, Ballistas on tall towers for priority targets, and Trebuchets behind the line for area damage. Ballistas are the best all-purpose tower weapon because they are accurate, pierce up to three targets, and can focus enemy siege or elite units. Trebuchets are better when enemies arrive in dense groups or when you are attacking fortified positions. Early in a campaign, use Archers and a small melee screen; transition into Crossbowmen, Ballistas, Foot Knights or Mounted Knights, and Healers as your economy allows.
Direct ranking
The strongest choices at a glance
The most reliable late-game defensive core is Ballista plus Trebuchet, supported by Crossbowmen and a durable frontline. This combination covers the three problems that usually break a defense: high-value targets, massed infantry, and units reaching the wall.
Ballistas belong in the highest priority tier for castle defense. Their high accuracy, strong single-target damage, long range, and ability to pierce targets make them especially effective against enemy artillery, heavy units, and dangerous specialists. Their weakness is line of sight, so they need a tall position and an unobstructed firing lane.
Trebuchets are the best answer to crowds and fortified positions. They are less dependable for precision targeting, especially when walls or nearby structures block the shot, but their area damage makes them efficient against large formations. Use them behind the main defensive line and manually target the ground where enemies cluster when necessary.
- S tier: Ballista for priority targets, Trebuchet for dense waves, Crossbowman for flexible tower and wall defense.
- A tier: Mounted Knight for mobility and counterattacks, Foot Knight for holding breaches, Healer for sustaining a frontline, and Horse Archer for mobile harassment.
- B tier: Archer for cheap early defense, Catapult as an affordable transitional siege unit, Spearman for durable screening, and Hammerguy for specialized anti-siege situations.
- Situational: Rebel Ballista, Rebel Catapult, Raider with Shield, Rebel Hulk, Sarranga Bombus, and other faction-specific troops can become excellent when the map and campaign branch support them.
| Situation | Best first choice | Why it works |
|---|---|---|
| Enemy siege or elite units | Ballista | Accurate long-range fire and strong focus damage. |
| Huge infantry groups | Trebuchet | Area damage is more valuable than precision. |
| Wall breach | Foot Knight or Spearman | A durable body buys time for ranged units. |
| Mobile map clearing | Mounted Knight | Speed lets it isolate camps and punish exposed units. |
| Low-resource opening | Archer | Cheap ranged damage protects the first wall. |
| Long defensive battle | Healer | Sustained healing reduces replacement pressure. |
No unit is best in every mission. A Ballista can underperform when its line of sight is blocked, while a Trebuchet can waste shots on small or highly mobile targets. Rank units by the job they must perform, not by their tier alone.
Fortifications
Which towers should you build?
For ordinary ranged troops, choose the tower that gives the range and vision your firing lane needs. Community testing indicates that tower families trade durability, capacity, vision, and range rather than offering a simple upgrade path where one structure is always superior.
Guard Towers are the practical choice when range matters more than structural health. They are useful behind or beside walls because their occupants can fire earlier, and they do not need to sit directly on the enemy’s approach path. Wood and Stone Towers are better when you expect the tower itself to absorb punishment or when your economy makes a sturdier platform more valuable.
Massive Towers are the key late-game platforms. They can hold multiple ranged troops or several war machines, while a Trebuchet can occupy the appropriate large tower slot. Place them where they can cover several approaches instead of stacking every platform on one section of wall.
Watchtowers are primarily vision tools. They help reveal approaching enemies and map areas, but they should not replace combat towers at the main kill zone. Build them on exposed edges, near expansion routes, or where early warning is more valuable than damage.
- Put Crossbowmen on walls or towers where they can fire continuously without friendly structures blocking the shot.
- Put Ballistas high enough to see over walls and terrain, then set them to prioritize the strongest target when enemy artillery or elites are present.
- Keep Trebuchets far enough behind the wall to survive, but close enough that their firing arc reaches the approach route.
- Use separate firing lanes for direct-fire Ballistas and arcing siege weapons so one line does not obstruct the other.
- Add a second wall or fallback position rather than filling every available tower before the defensive layout is complete.
| Tower role | Preferred occupant | Placement advice |
|---|---|---|
| Early warning | Archer or Watchtower | Use on the outer perimeter and near blind approaches. |
| Flexible defense | Crossbowman | Place on walls or mid-height towers with clear lanes. |
| Precision defense | Ballista | Use tall towers with unobstructed sight lines. |
| Area defense | Catapult or Trebuchet | Place behind the wall and aim at enemy concentrations. |
| Fallback defense | Crossbowman or Ballista | Cover the second wall and likely breach route. |
The official game description emphasizes clear lines of sight and the importance of towers for ranged troops. Ballistas are particularly sensitive to obstructions because they use direct fire rather than an arcing projectile.
Progression
Best choices from the opening to the late game
During the opening, do not rush a perfect endgame army if the first wave is already approaching. A small group of Archers supported by Swordsmen is an efficient way to clear nearby camps and protect builders. The goal is to reach the next research and production tier without starving the town or delaying essential walls.
The first major transition is Crossbowman access. Crossbowmen cost iron, so they should follow stable iron production rather than replace every early Archer immediately. They are strongest when the map has walls, towers, and repeated defensive waves because their range and damage remain useful from a protected position.
The second transition is Engineer Guild II and the arrival of Ballistas, Chimera, and Trebuchets. Prioritize Ballistas when enemy siege and high-health units are the main threat. Add Trebuchets when waves become dense or when you must assault enemy fortifications. Catapults remain a reasonable bridge until the stronger siege options are affordable.
In the late game, maintain a mixed force instead of converting everything into one unit. Ballistas handle priority targets, Trebuchets soften crowds, Crossbowmen finish units that reach the wall, and Knights or Foot Knights stabilize breaches. Healers increase the value of any frontline that survives several engagements.
- Opening: Build enough Archers and Swordsmen to secure the immediate area, then invest in economy and walls.
- Midgame: Add Crossbowmen when iron is reliable, and keep Archers where their low resource cost is still useful.
- Late midgame: Produce Ballistas for precision damage and retain Catapults until Trebuchets are affordable.
- Endgame: Combine Ballistas, Trebuchets, Crossbowmen, frontline units, and healing instead of relying on a single damage type.
| Progression point | Recommended focus | Avoid |
|---|---|---|
| First waves | Archers, Swordsmen, basic walls | Overbuilding expensive troops before the economy starts. |
| Barracks II | Crossbowmen with a melee screen | Spending all iron before tools and infrastructure are stable. |
| Engineer Guild II | Ballistas or Trebuchets based on the threat | Building siege without planning firing lanes. |
| Final waves | Mixed siege, ranged, frontline, and healing | Using only walls and ignoring breaches or enemy artillery. |
On a map with little iron, early Axe Warriors, Archers, or faction-specific troops can preserve momentum. On a map with open space and long approaches, siege and mounted units gain value because they have more time to fire or reposition.
Modes and maps
How the ranking changes by mode
Campaign missions reward adaptation. King-side missions usually favor the standard Lord’s Troops progression, while Rebel and Sarranga branches introduce their own barracks, research, and battlefield roles. Rebel Barracks access includes Raider with Shield, Rebel Catapult, Rebel Hulk, and Rebel Ballista, so a Rebel campaign can reach projectile resistance and area damage through a different route than the normal roster.
Endless Mode places the greatest value on repeatable defensive damage and easy target selection. Ballistas become increasingly attractive against dangerous high-health enemies and enemy siege, while Trebuchets remain valuable when the map funnels large groups into a narrow approach. The best layout is normally layered: an outer delay line, a main wall, a ranged line, and a fallback position.
Tower-defense challenges and custom maps can reverse the usual priorities. If the objective gives you limited space and immediate waves, use the strongest available area damage and a compact wall. If the map gives long sight lines, Ballistas and mounted troops gain value. If mountains, buildings, or wall segments block direct fire, shift more of your capacity toward Crossbowmen and Trebuchets.
The current game also includes newer faction content and a reworked research tree that gives lower-tier troops additional ways to remain relevant. That means older advice saying that every early unit is obsolete should be treated cautiously: upgrades and research can change the value of a cheap unit in a particular campaign branch.
- Campaign: Follow the normal tier progression, but adapt to available iron, map space, and faction research.
- Endless: Favor Ballista precision, Trebuchet area damage, and layered fallback defenses.
- Tower-defense challenges: Spend immediately on the damage type that matches the first wave, usually area damage against swarms.
- Open maps: Add Mounted Knights or Horse Archers for clearing and emergency response.
- Chokepoint maps: Concentrate Trebuchets, Crossbowmen, and a frontline where enemies are forced to gather.
| Map or mode | Highest-value approach | Main caution |
|---|---|---|
| Standard campaign | Balanced progression into Ballista and Trebuchet | Do not delay economy for a late-game composition. |
| Endless Mode | Layered walls with Ballistas and Trebuchets | Protect firing lanes and prepare for breaches. |
| Chokepoint map | Area damage at the funnel with precision fire behind it | Avoid placing all towers where one breach can disable them. |
| Open map | Mounted response force plus long-range towers | Mobile units must not replace the main defensive line. |
| Rebel or Sarranga branch | Use faction research and unique units | Do not assume Lord’s Troops rankings transfer perfectly. |
Public sources do not provide one authoritative, current numerical tier list for every faction, map, difficulty, and research state. The rankings here are therefore role-based recommendations grounded in official descriptions, current developer updates, and recent player testing.
FAQ
Common questions
Are Ballistas better than Trebuchets?
Neither is universally better. Ballistas are better for accurate fire against artillery, elites, and other high-value targets. Trebuchets are better for dense waves, clustered infantry, and enemy fortifications. A strong late-game defense normally uses both.
Should I put Ballistas on the highest tower?
Use the tallest practical tower that gives a clear firing lane, especially when walls, mountains, or buildings obstruct direct fire. Height improves access to targets, but placement matters more than simply building the largest structure everywhere.
Are Crossbowmen worth their iron cost?
Yes, once iron production is stable. They are flexible defenders that can use walls or towers and provide stronger ranged damage than Archers. Keep Archers when food, wood, or iron is tight, because replacing every early unit can damage your economy.
What is the best unit for defending a wall breach?
Foot Knights, Spearmen, or another durable frontline unit should hold the breach while Crossbowmen, Ballistas, and siege weapons attack from behind. Healers make the frontline much more effective in prolonged fights.
Do I need Watchtowers in the main defense?
Usually not. Watchtowers are primarily for vision and early warning. Use combat towers for the main kill zone, and place Watchtowers on the perimeter or near approaches where revealing enemies early has strategic value.
Does the same unit tier list work for Rebel and Sarranga campaigns?
No. The broad roles remain useful, but faction-specific research and units change the best progression. Compare each branch by its available production buildings, resource demands, projectile resistance, area damage, and mobility before copying a standard Lord’s Troops build.
Sources
What we checked
Official listings establish current availability and product facts. Community pages are used for mechanics and build history, then labeled separately.
- OfficialDoor 407 official announcement archive, including the Penetrative Update and current patch information
- OfficialDoor 407 official announcement for the Deep Update research-tree rework
- OfficialOfficial Steam store page with the game’s tower, line-of-sight, and siege overview
- ReferenceCommunity reference for tower range, capacity, and fortification comparisons
- CommunityCommunity-maintained Ballista reference with current role and line-of-sight notes
- CommunityCommunity-maintained Crossbowman reference with production and defensive role information
- CommunityRecent Steam discussion comparing Ballistas, Trebuchets, and defensive targeting