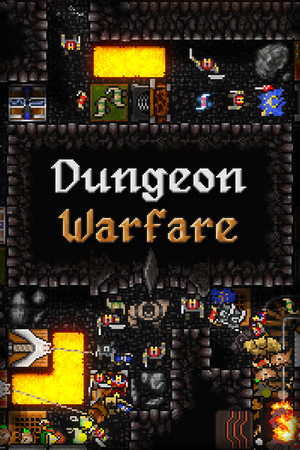
This is a strategy recommendation, not an official developer tier list. Community sources disagree on which damage trap is strongest, and performance depends heavily on map geometry, trap mastery, runes, equipment, and enemy composition.
Fast answer
The answer before the background
The best all-purpose setup is a control kill box: Barricade or Push Trap to shape the route, Freezing Trap or Bola Trap to slow enemies, Blackhole or another grouping tool to keep them together, and Axe, Lightning, Bolt, or Spinblade for damage. Put early skill points into Greed for experience and economy, then Brute for trap synergy and Portal Guardians. For hard late-game stages and Endless, respec toward Elite's Singularity and build around one strong central kill zone. This is the most dependable answer to the dungeon warfare 2 best build question, but map-specific counters remain important.
Core recommendation
The flexible control kill box
A strong general-purpose loadout should solve four problems: stopping movement, grouping targets, dealing sustained damage, and handling enemies that survive the first pass. Do not fill every slot with damage traps. A pure damage setup often loses to fast enemies, heavy units, shielded targets, or maps with awkward entrances.
Start with a route-shaping tool. Barricades are useful when you can create a single lane, while Push Traps and Spring Traps are better when the map gives you walls, pits, or long reset paths. Add Freezing Trap or Bola Trap to buy time. Then place a grouping or displacement tool, such as Blackhole, near the main damage zone. Finish with two or three damage traps that cover different weaknesses.
- Early progression: Spike Trap, Dart Trap or Bolt Trap, Freezing Trap, Barricade, and Push Trap.
- General campaign: Axe or Spinblade for reliable area damage, Lightning or Bolt for ranged coverage, and Blackhole or freezing support.
- Boss maps: prioritize control, repeated damage windows, and a Portal Guardian backup rather than maximum theoretical damage.
- If a map has several entrances, use inexpensive control at each entrance and reserve your strongest damage cluster for the lane with the longest travel distance.
| Player goal | Recommended core | Why it works |
|---|---|---|
| Clear normal campaign maps | One damage trap, one control trap, one route-shaping trap, and one ranged finisher | It remains affordable and handles varied enemy groups. |
| Beat a difficult stage | Blackhole or freezing support with Axe, Lightning, Bolt, or Spinblade | Grouping and delay let expensive damage traps fire repeatedly. |
| Farm experience and items | Reliable kill box with Greed investment and safe replayable maps | Consistency matters more than a fragile high-roll setup. |
| Push Endless | Singularity-centered mixed trap setup with strong control | Trap diversity and concentrated effects help manage scaling pressure. |
The official store description confirms multiple trap types, three skill trees, equipment, runes, handcrafted levels, and Endless mode. The community reference also documents trap mastery, three upgrade tiers, consumable traps, and increased cost after repeatedly placing one trap type.
Progression plan
Best skills by stage of the game
Skill points can be respecced without cost according to the reviewed community guides, so treat the trees as a toolkit rather than a permanent class choice. Your priorities should change as your economy, trap mastery, and map knowledge improve.
During the opening hours, Greed is the safest investment. Learning improves progression speed, while economy-focused skills help you build a functioning kill box before the first wave becomes dangerous. This is especially valuable when trap levels and starting gold are still low.
Once your damage traps are established, add Brute. Linkage and related synergy effects are most useful when several compatible traps are placed close together. Portal Guardian is a practical safety net for escapees and is particularly helpful while learning unfamiliar maps.
For advanced stages, move points into Elite and test Singularity. Community guides commonly build around it because it rewards using a compact selection of different traps in one concentrated area. Treat that as a strong late-game recommendation, not a universal rule: some maps punish centralization or require separate coverage.
- Early: prioritize experience and enough economy to open the kill zone quickly.
- Mid-game: add Brute synergy, force, and Portal Guardian support when the map benefits from displacement or emergency defense.
- Late-game: invest in Elite control tools, especially Singularity, then tune Brute or Greed points to the map.
- Do not spend valuable upgrade choices only because a trap is popular. Master the traps that fit your current routes and objectives.
| Stage | Skill emphasis | Practical adjustment |
|---|---|---|
| Early campaign | Greed first, with limited Brute support | Build cheaply and respec when a map demands more control. |
| Mid campaign | Greed economy plus Brute synergy | Support grouped traps and add Portal Guardians for mistakes. |
| Late campaign | Elite control, then Brute or Greed refinement | Use a compact kill box and counter the stage's special threats. |
| Endless | Elite-centered setup with targeted Brute bonuses | Value scaling, trap diversity, and repeatable control over fast clears. |
The reviewed sources do not provide an official numerical ranking for every skill. The skill path above combines documented tree functions with recurring community recommendations, so exact point totals should be adjusted to your unlocked traps and equipment.
Loadout comparisons
Which damage package should you choose?
Axe is a strong recommendation for crowded kill zones because its damage benefits from enemies being held in place. It pairs naturally with Blackhole, freezing effects, and other tools that keep targets inside its threat area. Spinblade is another good area-damage option when enemies travel through a predictable lane.
Lightning is preferable when several enemies can remain within bounce range, while Bolt is a safer choice for direct ranged coverage. Dart Trap is efficient and can become much stronger with the right upgrades or equipment, but it should not be treated as an automatic answer for every stage. The Arcshard item can specifically improve Dart Trap performance, which makes item availability part of the decision.
Spike Trap is excellent when enemies repeatedly cross the same tile or when you need a cheap early damage source. It becomes less universally reliable when enemies spread out, ignore the intended lane, or require sustained ranged pressure.
- Choose Axe or Spinblade for dense, delayed kill boxes.
- Choose Lightning for multi-target lanes and Bolt for direct coverage or point-blank setups.
- Choose Dart Trap when its mastery, upgrades, or equipment bonuses are already developed.
- Choose Spike Trap for economical early clears and maps with predictable crossings.
- Keep at least one control tool even in a damage-focused loadout.
| Package | Best use | Main limitation |
|---|---|---|
| Axe plus grouping | Crowded central kill zones and hard stages | Needs enemies to remain in its effective area. |
| Lightning plus freezing | Long lanes with repeated multi-target contact | Charging or bounce behavior can be less reliable on scattered enemies. |
| Bolt plus barricades | Direct coverage around a controlled route | Less efficient if enemies approach from many angles. |
| Dart plus mastery or Arcshard | Sustained fire and specialized scaling | Its best performance depends more on upgrades and item support. |
| Spike plus Push or Spring | Cheap early progression and repeated tile crossings | Can struggle against spread-out or highly mobile targets. |
Test the same trap package on the actual stage rather than judging it in isolation. A weaker trap with perfect geometry can outperform a stronger trap placed where enemies rarely remain.
Execution
How to adapt the build to any map
First, pause before spending most of your gold. Identify the longest route, the safest place for a kill box, and any tiles where enemies can be pushed into walls or hazards. Then place one control trap and one damage trap and watch the first wave. Expand only after you know where enemies are actually dying.
Second, separate entrance control from final damage. Cheap traps near entrances should slow, redirect, or split groups. The expensive traps belong where enemies are already compressed. This prevents early leaks from consuming the gold needed for the main defense.
Third, change only one major variable when a run fails. If enemies reach the core with full health, improve damage. If they bypass the kill box, improve route control. If the first wave succeeds but later waves collapse, improve scaling, grouping, or boss coverage instead of simply adding another copy of the same trap.
Finally, use replayable stages to gain experience, gems, mastery, and equipment. The beginner guide specifically recommends revisiting levels and experimenting because mastery and skills can be changed without a respec fee.
- Scout the route before committing gold.
- Use control at entrances and damage at the final compression point.
- Watch one complete wave before buying the next expensive trap.
- Respec between stages instead of forcing one build through every objective.
- Use consumable traps whenever they fit the map; they periodically reload and do not replace a permanent trap slot.
FAQ
Common questions
Is Singularity mandatory for the hardest stages?
No. It is a powerful late-game recommendation from community guides, especially for compact mixed-trap kill boxes, but it is not mandatory. Some layouts are better served by separate lanes, stronger economy, or a direct counter to a particular enemy trait.
What are the best skills for a new player?
Start with Greed's experience and economy options, then add Brute support and Portal Guardian utility. Once your traps and mastery are developed, experiment with Elite skills. Because respecs are reported as free, you can test alternatives without permanently damaging the account.
Should I spam one trap type?
Usually not. The game encourages mixed trap combinations, and the documented trap reference says repeated placement of one type increases its later cost. A specialized setup can still work when its mastery and geometry are excellent, but mixed control and damage is normally more economical.
Which trap should carry my early campaign?
Spike Trap, Dart Trap, Bolt Trap, or another dependable damage option can carry early maps, provided it is supported by slowing, blocking, or displacement. The best choice depends on the route and on which trap has received your mastery and upgrade investment.
Sources
What we checked
Official listings establish current availability and product facts. Community pages are used for mechanics and build history, then labeled separately.
- OfficialDungeon Warfare 2 official App Store listing
- OfficialDungeon Warfare 2 official Steam community page
- CommunityBeginner Guide for Dungeon Warfare 2
- ReferenceDungeon Warfare 2 trap reference
- ReferenceDungeon Warfare 2 skills reference
- CommunityDungeon Warfare II community notes and general build