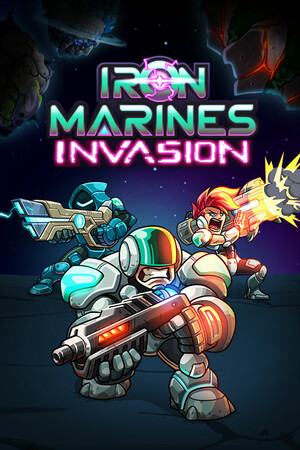
The game does not provide an official developer tier list or complete public balance spreadsheet. The rankings below are recommendations based on documented unit roles, mission demands, and consistent practical use; exact performance can change with upgrades, heroes, difficulty, and player control.
Fast answer
The answer before the background
The best all-purpose setup is Stormtoads, Specialists, and Gale during progression, with Instigators replacing Gale when a mission has few flying enemies and many durable ground targets. For late-game or Impossible missions, use a frontline unit such as Stormtoads or Knight, a high-damage option such as Specialists or Sentinel, and a specialist slot chosen for the map: Bomberfrog against structures and clusters, Gargoyle against prolonged ground fights, Nanitaar for healing, or Frostbite when slowing and freezing are more valuable than raw damage. Treat this as a matchup guide rather than a permanent tier list.
Quick ranking
Best units in Iron Marines Invasion by job
A squad is only as strong as the jobs it covers. You can bring three squads into a mission, so the most dependable team usually combines a blocker, a damage dealer, and a counter for the map’s main threat. The official support page confirms that the game allows three selected squads from eight core teams: Commandos, Scoundrels, Frognauts, Mechas, Fellhood, Ascendii, Cathros, and Daikaijus.
The table ranks individual units by practical value rather than by raw statistics. A unit can be lower on the list and still be the correct choice for a specific objective. For example, Bomberfrog is not a universal replacement for Specialists, but it is the better answer when structures or tightly packed enemies dominate the mission.
- S tier, broadly useful: Stormtoad, Specialist, Gale, Sentinel, Instigator.
- A tier, powerful in the right mission: Bomberfrog, Gargoyle, Nanitaar, Frostbite, Knight, Mauler.
- B tier, useful but more dependent on terrain or enemy composition: Ranger, Apocrita, Bubblewog, Jackshooter, Jetpack Rebel, Scytheer, Dignatarii, Sphynx-o, Bengalat, Korathros, Scorchwing, Monarch.
- Use cautiously: units whose strengths duplicate another squad you already selected or whose attacks cannot answer the mission’s main enemy type.
| Unit | Best role | Why it ranks well |
|---|---|---|
| Stormtoad | Frontline anchor | Heavy armor, solid movement, and dependable damage let it hold enemies while ranged units work. |
| Specialist | Long-range damage | Its rifle is described as piercing every armor type, making it a strong answer to durable targets. |
| Gale | Air and mobility | It attacks flying units, has good survivability, and can handle isolated resource tasks. |
| Sentinel | Late-game ranged damage | Its railgun combines long range, area damage, and armor piercing. |
| Instigator | Damage support | It can pierce armor and increase the damage of nearby allies. |
| Bomberfrog | Structures and groups | Explosive attacks are especially effective against structures and clustered enemies. |
| Gargoyle | Persistent area pressure | Its corrosive pools continue threatening enemies after the initial attack. |
| Nanitaar | Healing support | It restores the health of nearby allies and improves the endurance of a push. |
The unit abilities and squad roster are documented by community reference material and official game pages, but the developer does not publish a formal tier ranking. The S and A labels are therefore editorial recommendations, not official ratings.
Progression
The strongest choices from the opening missions to the endgame
Early progression is resource-sensitive, so cheap versatility matters more than a flashy late-game unit. Rangers are a serviceable starting infantry option, but Specialists should become a priority once available. Keep Rangers or another basic frontline unit in front, then place Specialists behind them so their slow but powerful shots are protected.
When Frognauts unlock, Stormtoads are the safest upgrade to the early frontline. They pair naturally with Specialists because they absorb pressure while the Commandos deal focused damage. Add Gale when aerial enemies, separated objectives, or resource collection become regular parts of the mission design. This opening core is also supported by an independent early-game guide, which recommends Specialists, Stormtoads, Gale, and Instigators for the first part of the campaign.
Instigator is the best fourth unit to learn early, even though it is not always the third squad you bring. Its nearby damage boost rewards careful positioning and makes a group of Specialists more threatening. Use it when the mission asks you to kill armored targets quickly; leave it out when air control or healing is more urgent.
In the late campaign, Sentinel is the cleanest direct upgrade for long-range damage against armor and groups. Bomberfrog is better when bases and structures are central objectives. Gargoyle is a strong pressure unit for battles where enemies remain in a contested area, while Nanitaar is the safer choice for long missions, escort work, or difficult pushes where keeping the frontline alive matters more than speed.
- Opening: Rangers plus Specialists when available, with Stormtoads as the first major frontline upgrade.
- Mid-campaign: Stormtoads, Specialists, and Gale cover ground pressure, armor, and air threats.
- Damage-focused: Replace Gale with Instigator when the map has few flying enemies and many durable ground targets.
- Late campaign: Use Sentinel for armor-piercing ranged pressure and Bomberfrog for structures or dense groups.
- Difficult clears: Add Nanitaar when survival is the limiting factor rather than damage.
| Progression stage | Recommended three-squad shell | Main adjustment |
|---|---|---|
| Early | Commandos, Frognauts, and a basic infantry option | Protect Specialists and avoid spending heavily on units that duplicate their role. |
| Mid | Specialists, Stormtoads, and Gale | Swap Gale for Instigator if the map is ground-heavy. |
| Late | Sentinel or Specialists, Stormtoads or Knight, plus a specialist | Choose Bomberfrog, Nanitaar, Gargoyle, or Frostbite according to the objective. |
The game is built around changing squads between missions. Save upgrade resources for a flexible core instead of trying to force one composition through every planet.
Map and mode guide
Best picks for air, armor, structures, swarms, and Impossible
For flying-heavy maps, Gale is the safest general answer because it can attack aerial units. Apocrita is another reasonable choice when you want long-range anti-air firepower, especially if the mission also contains ground targets that need ranged support. Do not bring a purely ground-focused squad without checking the enemy roster first.
For armored enemies, Specialists, Instigators, and Sentinel are the most attractive recommendations. Specialists offer reliable armor-piercing fire, Instigator adds both armor-piercing attacks and a team damage effect, and Sentinel brings long-range area damage with armor piercing. Use a Stormtoad or Knight to stop those targets from reaching the shooters.
For structures, Bomberfrog and Mauler deserve priority. Bomberfrog’s explosive attack is particularly effective against structures, while Mauler is a heavily armored vehicle built around smashing them. On maps with several bases, defenses, or stationary objectives, these choices are more valuable than another general-purpose rifle unit.
For swarms or cramped combat zones, Bomberfrog, Gargoyle, and Frostbite are practical answers. Explosions punish clustering, corrosive pools keep dealing pressure in contested areas, and slowing or freezing buys time for towers and ranged units. Bubblewog can also help when protection or knockback is more important than damage.
Difficulty changes how much you value consistency. Casual and Normal allow more experimentation, while Veteran and Impossible punish weak coverage and poor positioning. Impossible is officially unlocked only after completing the campaign on any difficulty, so it is better treated as a second-pass challenge than as the place to discover your first roster.
On high difficulty, prioritize a frontline that buys time, one dependable armor answer, and one map counter. A balanced trio is usually safer than three damage squads. Move units manually, focus fire priority targets, and retreat a damaged frontline before it collapses; the best tier list cannot compensate for losing the only unit holding a lane.
- Air threats: Gale first, Apocrita when long-range anti-air fire is needed.
- Armor: Specialists, Instigator, or Sentinel behind Stormtoads or Knight.
- Structures: Bomberfrog or Mauler.
- Swarms: Bomberfrog, Gargoyle, or Frostbite.
- Healing and endurance: Nanitaar, especially for escorts and long pushes.
- Impossible: Favor coverage and control over a single high-damage gimmick.
| Mission condition | First pick | Backup choice |
|---|---|---|
| Many flying enemies | Gale | Apocrita |
| Armored elites or vehicles | Specialist or Sentinel | Instigator |
| Enemy bases and structures | Bomberfrog | Mauler |
| Long contested fights | Gargoyle | Nanitaar |
| Large groups approaching together | Bomberfrog | Frostbite |
| Escort or attrition objective | Nanitaar | Stormtoad |
Public sources describe unit roles but do not provide a complete official matchup chart for every planet or special operation. Use the enemy preview and objective text as the final authority before launching.
Practical setup
How to choose the right three squads before each mission
Start by identifying the mission’s failure condition. If the objective is survival, choose a durable frontline and healing or control. If it is destruction, add Bomberfrog or Mauler. If it contains aerial waves, reserve one slot for Gale or Apocrita. If you must split forces across the map, prioritize mobile or self-sufficient units rather than a slow damage stack.
Next, check whether your hero already fills one of these jobs. A tank hero reduces the need for a second frontline squad. A hero with strong area damage can make Specialists or Sentinel more valuable because they cover the armor problem while the hero handles groups. Conversely, if the hero is fragile, Nanitaar or Bubblewog can be worth more than another attacker.
Finally, test the first engagement rather than committing blindly. If your frontline loses health too quickly, replace a damage squad with healing or protection. If enemies survive long enough to reach the base, add armor piercing or area damage. If air units bypass your formation, change the roster immediately instead of trying to repair the mistake with upgrades alone.
- Read the enemy and objective preview before selecting squads.
- Cover at least one frontline, one reliable damage source, and one mission-specific threat.
- Avoid bringing two squads that solve exactly the same problem.
- Use manual movement to keep Specialists, Sentinel, and Nanitaar behind the frontline.
- Rebuild the squad for difficult planets instead of treating the first successful composition as permanent.
For a simple default, select Stormtoads, Specialists, and Gale. Replace Gale with Instigator for armor-heavy ground missions, with Bomberfrog for structures or crowds, and with Nanitaar when survival is the main challenge.
FAQ
Common questions
What is the best overall squad combination?
Stormtoads, Specialists, and Gale are the safest general-purpose combination for progression. They provide a frontline, armor-piercing ranged damage, and an answer to flying enemies. Change the third slot when the mission has a clear structure, healing, or crowd-control requirement.
Are Specialists better than Rangers?
Specialists are usually better against armored or high-health targets because their documented role includes armor-piercing fire. Rangers remain useful as an accessible, flexible early unit and as a screen in front of slower damage dealers.
Is Gale worth using after the early game?
Yes, when the map contains flying enemies, separated objectives, or resource tasks. If the mission is entirely ground-based, replace Gale with Instigator, Bomberfrog, Sentinel, or Nanitaar according to the objective.
Which units are best against structures?
Bomberfrog is the strongest direct recommendation because its explosive attack is especially effective against structures. Mauler is another good option when you also need a heavily armored unit that can fight on the frontline.
What should I use on Impossible mode?
Use a balanced composition rather than three damage squads. Stormtoads or Knight can hold the front, Specialists or Sentinel can answer armor, and Gale, Bomberfrog, Nanitaar, or Frostbite should fill the slot dictated by the map. Impossible unlocks after completing the campaign on any difficulty.
Is there an official unit tier list?
No official source located for this guide publishes a complete tier list with numerical rankings. The recommendations here are role-based and should be adjusted for upgrades, heroes, difficulty, and the enemy preview.
Sources
What we checked
Official listings establish current availability and product facts. Community pages are used for mechanics and build history, then labeled separately.