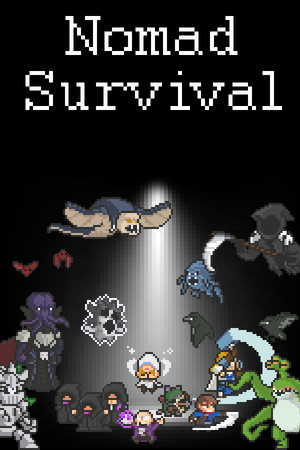
This guide avoids unverified exact drop rates and disputed unlock requirements. Some older community references list different conditions for unlockable characters, so check the achievement or Unlocks screen in your own build.
Fast answer
The answer before the background
For your first few runs, choose a starting character, play the first map at normal speed, and keep moving in wide circles around the enemy crowd. Collect experience safely, improve one strong damage ability to its important breakpoints, then add a second source that covers a weakness such as close-range pressure or poor area coverage. Do not rush challenges or the second map. Use early victories to learn events and bosses, unlock more options, and buy permanent upgrades. Once you can reach the first map’s later stages reliably, begin testing different characters, Heritages, pets, and map-specific builds.
Start here
A reliable first-run plan
The game is a time-based, auto-attacking roguelite: you control movement while abilities trigger automatically, and level-ups let you acquire or improve abilities. That makes positioning and upgrade discipline more important than rapid aiming. The official store description also notes that enemy waves change over time and follow predictable patterns, so each run should teach you something even when it ends early.
Begin with the first map and leave the speed setting at normal until you understand the enemy density. Choose a starting character whose weapon skill feels easy to control rather than chasing a complicated build. Your first objective is not a perfect run; it is learning how much space you need, where enemies approach from, and when a boss or event changes the safe route.
- Move in a broad loop instead of making sharp, repeated turns. This gives automatic attacks more time to fire while keeping enemies grouped behind you.
- Collect experience whenever the route is safe, but do not cross a dense pack for a single pickup. Surviving usually creates another opportunity to collect it.
- At early level-ups, strengthen one dependable damage option before taking several unrelated abilities. A focused build is easier to evaluate and less likely to leave you with weak coverage.
- Once your main damage option is stable, add a complementary ability or passive that fixes its range, cooldown, crowd-control, or survival weakness.
- Pause before a boss if the game allows it, check your build, and enter with room to maneuver rather than fighting against a wall or corner.
| Run stage | Priority | What to avoid |
|---|---|---|
| Opening minutes | Reliable damage and safe experience collection | Chasing every pickup through enemies |
| Middle of a run | Area coverage plus one defensive answer | Taking upgrades only because they are new |
| Boss or major event | Space, predictable movement, and sustained damage | Standing still to maximize attacks |
| After the run | Permanent upgrades and reviewing mistakes | Immediately repeating the same failed build |
The automatic attacks, level-up ability choices, character Weapon Skills, branching Weapon Skill Evolutions, Heritages, maps, bosses, pets, and challenges are documented on the Steam page. The exact order above is a practical recommendation, not a mandatory in-game rule.
Build discipline
How to choose upgrades without wasting a run
The store description says abilities can be leveled to 10, with non-passive abilities gaining bonus effects at levels 5 and 10. Treat those levels as natural checkpoints: first make one ability dependable, then decide whether pushing it further is better than adding coverage. This prevents a common beginner problem where every ability is underdeveloped and none can handle the next wave.
Think in jobs rather than names. A damage option should clear ordinary enemies; another option should help with a different range or angle; passives should support damage, movement, defense, or consistency. If a choice does not improve your current weakness and does not help your main plan, it is usually reasonable to reroll or choose the safer alternative when available.
Heritages and pets can change the shape of a run. Do not judge them after one unlucky attempt. Test one change at a time so you can tell whether the problem came from the character, the Heritage, the map, or your upgrade choices. The Nomad Heritage is described as providing an additional reroll, while the Poxbringer Heritage changes damage into damage-over-time; these examples show why a familiar build may behave very differently after a Heritage swap.
- Favor consistency while learning; save experimental combinations for runs where you already understand the map.
- Do not assume the highest displayed damage is best if it leaves you unable to handle enemies approaching from another direction.
- When a run fails, identify the first failure point: weak damage, poor movement, missed experience, bad boss positioning, or an unsuitable upgrade path.
| If you struggle with… | Try prioritizing… | Reason |
|---|---|---|
| Enemies surrounding you | Area coverage or crowd control | Creates a safer movement lane |
| Bosses surviving too long | A focused damage upgrade and better positioning | Shortens the dangerous phase |
| Missing experience | A tighter route and fewer risky detours | Improves growth without trading away health |
| A build feeling random | Fewer core abilities and clearer upgrade roles | Makes each level-up meaningful |
The official listing does not provide full ability values, exact scaling, or a complete tier list. Any claim that one fixed build is always best should be treated cautiously.
Progression
The safest route from beginner to challenge runs
Use the first map as your training ground. The developer describes it as a place to experiment with stats and learn its unique challenges, while the second map is significantly harder. That supports a gradual progression path: become comfortable with ordinary runs first, then move forward when your survival is repeatable rather than when you happen to get one lucky attempt.
After each successful run, inspect new characters, Heritages, pets, permanent stats, and achievement objectives. The game advertises three initial characters, six additional unlockable characters, one starting Heritage, eight additional Heritages, four maps, four bosses per map, two challenges per map, and more than 100 achievements. You do not need to pursue all of these systems at once. Unlocking variety first makes later challenge attempts less restrictive.
For an achievement-focused route, let ordinary clears unlock the basics naturally, then target specific objectives one at a time. Older community guides disagree about some character requirements, including which achievement unlocks particular characters. Because of that conflict, use the current objective shown in-game as the authority and treat external lists as planning references only.
- First, clear the opening map with a straightforward build and learn its bosses.
- Next, invest in permanent upgrades that improve several characters or builds rather than a narrow experiment.
- Then, test another starting character and at least one Heritage so you learn how the systems interact.
- Attempt the second map only when you can handle the first map’s later waves without relying on perfect upgrade luck.
- Leave map challenges and completionist combinations until you have a broader roster and stronger permanent progression.
| Goal | Recommended timing | Why |
|---|---|---|
| Learn basic movement and level-ups | First several runs | Builds transferable skill |
| Unlock broader options | After early clears | Provides more ways to solve difficult maps |
| Push the second map | After consistent first-map survival | Reduces wasted attempts on a sharper difficulty increase |
| Complete challenges | After upgrades and build testing | Challenges are easier when you understand the normal version first |
| Clean up achievements | After core progression | Prevents obscure objectives from interrupting learning |
A community achievement reference lists 116 Steam achievements, but achievement percentages and unlock descriptions can change or be presented differently across sources. Confirm the exact text in your own Steam or in-game achievement screen.
Avoid these traps
Common mistakes that slow progression
The most damaging error is treating every run as a race for maximum experience. A safe route with slightly fewer pickups is better than a dangerous detour that breaks your formation or puts you beside an event. Your movement also affects how well automatic attacks connect, so panic zigzags can reduce damage while making enemies harder to read.
Another mistake is changing too many variables after a defeat. If you switch character, map, Heritage, pet, and upgrade style at the same time, you learn nothing from the result. Keep a simple note after each failed run: where you died, what surrounded you, and which ability or defense was missing. Then change one or two decisions on the next attempt.
Finally, do not use increased game speed as a substitute for understanding. The store page confirms that speed can be modified, including faster settings, but faster play leaves less time to react. Treat it as a later efficiency option, not as the default for learning bosses or challenges.
- Standing still because attacks are automatic.
- Taking every new ability instead of strengthening a coherent core.
- Spending all attention on experience while ignoring dangerous enemy paths.
- Repeating a failed build without identifying its actual weakness.
- Attempting difficult challenges before permanent progression and map knowledge are ready.
- Relying on an old unlock list when the current in-game objective says something different.
FAQ
Common questions
What should I do first in Nomad Survival?
Play the first map at normal speed with a starting character, keep moving in wide circles, and focus early level-ups on one dependable damage option. Your first goal is to learn enemy movement and boss positioning, not to complete every objective immediately.
Should I unlock everything before moving to the second map?
No. You do not need a complete roster, every Heritage, or every pet first. Move on when you can survive the first map consistently and understand why your successful builds work. Permanent upgrades and a few tested options are more useful than total completion.
Are old character unlock guides reliable?
Only partly. Community references can help identify likely objectives, but some published lists disagree about exact requirements. Check the current achievement or Unlocks entry in your build before grinding a particular enemy or boss.
When should I use faster game speed?
Use faster speed after you understand the map and can react to its events comfortably. Normal speed is better for learning movement, boss patterns, and upgrade choices; faster settings are mainly an efficiency or challenge choice.
What is the best build?
There is no verified single best build from the available official information. A strong beginner build is one with a reliable main damage source, a second option that covers its weakness, and enough defensive or movement support to preserve safe space.
Sources
What we checked
Official listings establish current availability and product facts. Community pages are used for mechanics and build history, then labeled separately.