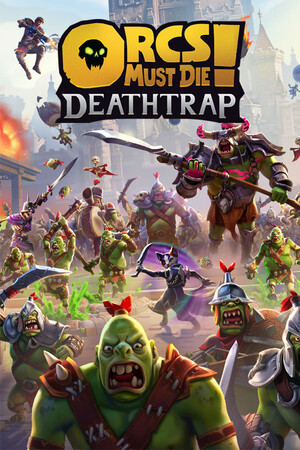
This guide includes recommendations based on verified ability descriptions and practical build priorities, but tier judgments are recommendations rather than official rankings.
Fast answer
The answer before the background
For a dependable solo build, choose Vaan or Wren. Vaan protects the Rift, improves trap damage with Rift Orb, and helps preserve Rift Points. Wren offers excellent ranged damage, trap acceleration, and strong Overdrive clones. In co-op, combine one damage-focused hero with one control or support hero: Wren plus Kalos, Vaan plus Harlow, or Gabriella plus Maximilian are sensible starting pairs. Build your skill tree toward the hero’s main job, then use Threads and traps to cover missing crowd control, anti-air, or boss damage.
How the roster works
Classes are really War Mage playstyles
Deathtrap does not use traditional selectable classes such as warrior, rogue, or mage. Each character is a War Mage with a fixed primary weapon, secondary ability, special ability, Overdrive, trait, movement ability, and unique trap. Your practical class is therefore the job you build around during a run.
The roster supports several clear roles. Vaan is a Rift and trap specialist, Wren is a ranged damage and trap-reset specialist, Harlow is an explosive area-damage character, Mac is a precision sniper, Kalos is a durable melee support, Sophie is a melee and summon damage dealer, Maximilian is a sturdy crowd-control fighter, and Gabriella is a ranged control specialist.
- Use Vaan when Rift safety, economy, and trap amplification matter most.
- Use Wren or Mac when you want to personally remove dangerous targets at range.
- Use Kalos when healing, protection, and holding a lane are more important than speed.
- Use Sophie or Maximilian when you prefer to fight inside the killbox.
- Use Harlow or Gabriella when your team already has a front-line hero and needs area control.
| War Mage | Core abilities | Best build identity |
|---|---|---|
| Vaan | Rift Lightning, Charge Beam, Rift Orb, Rift Protection | Solo safety, trap amplification, Rift economy |
| Wren | Perfect reloads, Proximity Orb, Trap Blast, Mirror Images | Ranged damage and accelerated killboxes |
| Harlow | Henry, Pretty Lights, Wind Blast, Treat Time | Explosions, burning, and area damage |
| Mac | Wrench Staff, Scan Weak Points, Gravity Blast, precision Overdrive | Weak-point damage and elite killing |
| Kalos | Hammer, Rage Ward, Nature’s Protection, Healing Berries | Durability, healing, and team support |
| Sophie | Knife Throw, Vampiric abilities, Vampire Jaws, Bartholomew | Rend, critical damage, and summon pressure |
| Maximilian | Max Crossbow, Stun Bolt, Nade Spam, Bladestaff | Stuns, burst damage, and survivability |
| Gabriella | Pox, Arcane Blast, Warp, Mesmerize | Enemy repositioning, debuffs, and control |
Maximilian and Gabriella are not equivalent to ordinary starting selections. Their unlock methods and availability have changed through updates, so check the in-game Fortress objectives rather than relying on an old unlock guide.
Skill tree guide
Spend points according to the job you actually perform
The general skill tree improves account-wide or mission-wide fundamentals, while each War Mage has a smaller character-specific route. The strongest early investments are usually the upgrades that improve trap damage, War Mage damage, health, loadout capacity, or the economy you use every wave.
Do not automatically chase primary-weapon damage. A character who exists to amplify traps can gain more from trap damage, cooldown, Rift, or utility upgrades than from a small weapon increase. Likewise, a ranged hero needs enough survivability and crowd control to keep firing when hunters or fliers bypass the barricades.
- General first route: take Utility Belt when available, then choose trap damage for the trap types you use most often.
- Solo route: value War Mage health, Rift Point protection, cheaper traps, and reliable revival upgrades more highly than multiplayer-only synergy.
- Vaan route: prioritize Crossbow Ammo, Bigger Rift Orb, Rift Lightning Boost, and Duplicator for a Rift-centered build.
- Wren route: prioritize Reload Bonus, Proximity Orb Power, Headshot Power, and Mirror Mirror for a precision-damage route.
- Kalos route: prioritize Nature’s Protection, Hammer Damage, and Rage Ward Damage before taking the full-heal upgrade.
- Sophie route: prioritize Knife Throw Critical Chance, stronger Bartholomew, and Lethal Strike when playing around critical hits.
- Harlow route: choose upgrades that improve Henry, fire or explosive damage, and the reliability of Pretty Lights.
- Gabriella route: favor Pox, Arcane Blast, Warp utility, and Mesmerize improvements when controlling dense waves.
| Build goal | Best stat priorities | Why it works |
|---|---|---|
| Trap engine | Trap damage, reset time, cost, loadout slots | More consistent killboxes and fewer gaps between activations |
| Solo survival | Health, Rift Point protection, healing, movement | Covers mistakes and enemies that bypass traps |
| Ranged carry | Primary damage, headshot or critical chance, ammo, cooldown | Lets the hero remove hunters, fliers, and priority targets |
| Melee control | Health, stun, launch, Rend, Overdrive charge | Keeps dangerous enemies away while generating combo value |
| Support control | Ability cooldown, unique-trap charges, debuffs, healing | Improves the whole team rather than only personal damage |
The existence and descriptions of these upgrades are referenceable, but the order above is a recommendation. Your map, difficulty, distortions, available Threads, and team composition can justify a different route.
Loadouts and stats
Build the trap bar around what the hero cannot do
A loadout should solve problems in priority order: lane control, damage, anti-air, large-enemy control, and emergency recovery. Every War Mage brings a fixed unique trap, while regular traps fill the remaining slots. The default regular-trap capacity is seven, with the skill tree able to increase it.
Trap stats are not limited to damage. Cost, reset time, range, activation duration, critical chance, placement surface, status effect, and enemy weight restrictions all affect real performance. A low-damage trap with a short reset can outperform a stronger trap if it keeps a killbox active throughout a wave.
Use status effects deliberately. Acid applies Melting and increases War Mage damage, Rend guarantees War Mage critical hits against the affected target, Launched enemies take increased damage, and Electrified can chain damage when a target dies. These effects are more valuable when your team brings the matching follow-up damage.
- Vaan loadout: pair Rift Orb with high-damage traps and add Tar, Web Spinner, or another control tool to keep enemies inside the buff.
- Wren loadout: use Time Crystals beside traps with valuable reset times, then add a reliable wall or ceiling damage source and anti-air coverage.
- Harlow loadout: combine Boom Barrel with a trap that already damages or controls a priority target, and bring a dependable answer to fliers.
- Kalos loadout: use Healing Berries near a safe fallback position and bring crowd control so the melee hero can stay healthy.
- Sophie loadout: bring traps that apply Rend, poison, or launch effects, then use Vampire Jaws before committing to critical damage.
- Maximilian loadout: favor stun, launch, and high-impact burst traps that create openings for Nade Spam and Bladestaff attacks.
- Gabriella loadout: bring a compact killbox around Warp Return and use traps that punish enemies after Warp groups them together.
| Stat or system | What to watch | Build implication |
|---|---|---|
| Health | Survival against hunters, bosses, and bypasses | Raise it earlier for solo play or melee heroes |
| Rift Points | Lives and objective protection | Vaan and defensive Threads become more valuable when deaths are costly |
| Rune Coin | What you can place during a wave | Cheaper traps and economy Threads support long missions |
| Combo and Overdrive | How quickly the ultimate becomes available | Use launch, stun, Rend, and trap chains to keep combos active |
| Reset time | How long a trap is unavailable | Wren and cooldown Threads become stronger in dense killboxes |
Deathtrap’s loadout is built around traps, a fixed hero kit, Threads, and mission choices. Do not import equipment or trinket systems from earlier Orcs Must Die! games into this guide.
Practical routes
Three reliable build paths
For a first solo run, choose Vaan, take Rift protection and trap amplification, and build a compact killbox with Tar or Web Spinner plus dependable wall and ceiling damage. Keep Rift Teleport somewhere useful rather than placing it where enemies can destroy the approach.
For a ranged carry route, choose Wren or Mac. Wren is the more forgiving choice because Trap Blast and Time Crystals help the whole defense, while Mac is better when you enjoy aiming at weak points and managing precision windows. Add one emergency stun or launch option so the build is not helpless when enemies reach the player.
For a co-op control route, pair a damage hero with a support hero. Kalos can supply healing and protection, Vaan can strengthen the trap network, and Gabriella can group enemies or turn small enemies against the Horde. In four-player missions, avoid four selfish damage builds unless everyone can cover anti-air, bosses, and Rift emergencies.
- Start each wave by identifying the most dangerous enemy type, not the largest group.
- Place the unique hero trap where it will be used repeatedly, not merely where it looks convenient.
- Spend early coin on a functioning killbox before buying luxury damage upgrades.
- Keep at least one trap or ability available for hunters, fliers, or a boss interruption.
- Reroll or replace a Thread only when it fails the mission’s main plan; random bonuses are not automatically upgrades.
| Situation | Recommended starting route | Main weakness to cover |
|---|---|---|
| Solo beginner | Vaan with trap damage and Rift protection | Personal burst damage and anti-air |
| Solo damage | Wren with reload, headshot, and Proximity Orb upgrades | Emergency control when enemies bypass traps |
| Melee player | Maximilian or Sophie with health, stun, and critical damage | Ranged hunters and fliers |
| Defensive co-op | Kalos plus a trap-amplifying hero | Slow wave clear if damage is too low |
| Control co-op | Gabriella with Warp Return and grouping tools | Bosses and elemental enemies that resist Warp |
Mission layouts, distortions, Threads, difficulty, and player aim change the value of every hero. Treat the routes above as stable starting points rather than a permanent tier list.
FAQ
Common questions
What are the best classes for beginners?
There are no formal classes, but Vaan and Wren are the easiest starting War Mages to build around. Vaan protects the Rift and strengthens traps, while Wren contributes both personal damage and trap utility.
What is the best solo build?
Use Vaan for the safest general-purpose route. Prioritize Rift protection, Rift Orb improvement, trap damage, and enough crowd control to keep enemies inside the killbox. Wren is the stronger alternative if you are comfortable aiming and timing reloads.
How should I build Harlow?
Build Harlow around Henry, explosive area damage, and fire or control Threads. Use Boom Barrel on priority targets or layered traps, and reserve Wind Blast for emergencies unless a Thread makes it reliable against heavier enemies.
How should I build Kalos?
Kalos works best as a durable support fighter. Take Nature’s Protection and Hammer Damage early, place Healing Berries in a safe fallback area, and use Rage Ward when the team needs damage or cooldown support.
Do Threads replace a skill tree route?
No. Skill-tree upgrades are persistent progression choices, while Threads are run-specific modifiers. The best results come from making them reinforce the same plan, such as trap reset support for Wren or Rift protection and economy for Vaan.
Sources
What we checked
Official listings establish current availability and product facts. Community pages are used for mechanics and build history, then labeled separately.