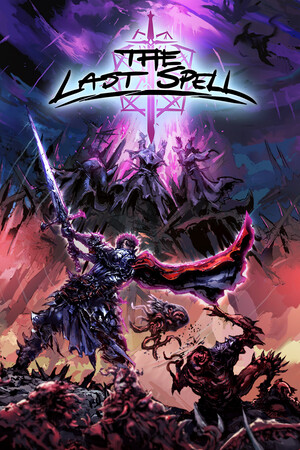
This guide contains boss names, encounter objectives and story-ending spoilers.
Fast answer
The answer before the background
The fastest way to prepare is to reserve at least one hero for high single-target damage, one reliable source of resistance or armor reduction, and enough movement or teleport options to cross the map. Boss nights continue spawning regular enemies, so do not spend every action chasing the objective. Kill the enemies that can immediately reach the Haven, then complete the boss condition. Bosses do not simply drop a fixed unique weapon: victory advances the map, awards the normal night rewards, and contributes to meta-progression. The main exception to a simple damage race is that several encounters are invulnerable until their linked objects or phases are cleared.
At a glance
Boss order and encounter conditions
The standard campaign path is Gildenberg, Lakeburg, Glenwald, Elderlicht and Glintfein. Runenberg and Amberwald are DLC maps with their own boss rules. The boss appears on the map’s final night, and the night does not end until its required objective is complete. Remaining monsters are removed after the boss is defeated, but they can still damage the Magic Circle while you work.
The order below is more useful than a simple difficulty ranking because each fight tests a different preparation check.
| Map | Boss or boss group | What ends the fight | Main counter |
|---|---|---|---|
| Gildenberg | Aello, Celaeno and Ocythoe | Defeat all three Corrupted Harpies | Keep heroes near the Haven; kill summoned Alerions and punish each harpy when it lands. |
| Lakeburg | Cetusia the Putrescent Wyrm | Complete the head-and-tail phases, then kill the exposed head | Use armor damage, resistance reduction, accuracy and concentrated damage. |
| Glenwald | Putrefied Dryads | Defeat twelve Dryads | Bring mobile single-target killers and clear plant summons before they multiply. |
| Elderlicht | The Archivist, King of Old | Extinguish each Soul Vessel phase, destroy the throne, then kill the Archivist | Prioritize vessels and the countdown; save burst damage for the final phase. |
| Runenberg | Enraged Dwarf Statues | Destroy the required Corrupted Runestones, then kill four statues | Split the squad without losing control of the main approach lanes. |
| Amberwald | Gangrenous Fleshclouds | Complete the map’s final Fleshcloud objective | Use the forest and Seeds defensively while keeping a route to each boss target. |
| Glintfein | Schaden and Freude | Defeat their initial and later forms | Prepare for a short, intense map and a final battle with unusual boss mechanics. |
If a guide calls them boss one, boss two or boss three, it usually means the first three standard encounters: the Corrupted Harpies in Gildenberg, Cetusia in Lakeburg and the Putrefied Dryads in Glenwald. The numbering is not a separate upgrade system.
Fight plan
Counters that work across boss nights
Build for the condition, not just the boss’s health bar. A hero who can deal huge damage but cannot reach a Dryad, see a target, hit a high-dodge enemy or destroy a linked objective may contribute less than a flexible support hero.
Before the final day, inspect every hero’s movement, skill range, accuracy, damage type and action economy. Upgrade one or two weapons for decisive single-target attacks rather than giving every hero a mediocre boss option.
- Keep one high-mobility hero available for distant targets. Teleport skills, movement potions and movement points are especially valuable against Harpies, Dryads and Runenberg’s separated objectives.
- Use armor reduction against heavily armored targets and resistance reduction against magic-resistant targets. Marking, weakening and debuff cleansing can be more valuable than another area attack.
- Do not overbuild walls at the expense of damage. Walls buy time, but a boss night can continue for many turns while new enemies spawn.
- Reserve mana, potions and premium single-target skills for the vulnerable phase. Spending everything on the first visible boss form is a common reason the final phase collapses.
- Place towers and defenses where they cover likely approaches without blocking hero movement. Boss fights often punish a compact formation that cannot rotate quickly.
Boss details
What each encounter is testing
The Harpy fight is a positioning test. Three named harpies take turns appearing, and the waiting harpies can summon Alerions. Do not chase a harpy into open ground with your whole team. Hold the center, clear the immediate summon threat and send one durable or mobile hero to finish an exposed target.
Cetusia is a phase-management fight. The head and tail must be dealt with through repeated stages before the final head can be killed. Watch for water-based attacks and avoid treating the first damage window as the end of the battle.
Dryads are a tempo check. The objective is twelve kills, and later Dryads become harder while producing more obstacles or plants. A single-target hero with movement skills, high damage and enough accuracy is more important than another broad area attack. Break only the obstacles needed to create a route, then finish the Dryad quickly.
The Archivist is a countdown encounter. The throne and Soul Vessels are the real objective during the opening phases. Extinguish the active vessels before the ritual reaches its dangerous cast; otherwise the Magic Circle and nearby units can take catastrophic damage. Once the throne is gone, the Archivist becomes a direct battlefield target.
Runenberg’s dwarf statues are invulnerable until the Corrupted Runestones are destroyed. Divide tasks carefully: one group can clear runes while another protects the Haven from the ordinary wave. After the first statue objectives are completed, expect more runestones before the remaining boss becomes fully vulnerable.
Amberwald’s Gangrenous Fleshclouds are confirmed as the map’s exclusive boss concept, but publicly indexed references provide fewer complete numerical details than the older encounters. Treat the fight as a mobility and area-control battle, and test the exact spawn pattern in a lower Apocalypse setting before committing to a high-difficulty run.
Glintfein is the base game’s final map rather than a conventional last-night boss only. Schaden and Freude appear during the map and return in altered forms for the concluding battle. The official 1.0 announcement describes Glintfein as a seven-night final map, so expect less time for economic scaling than in Elderlicht.
The encounter objectives and boss identities are documented facts. Weapon suggestions, formation advice and target priorities are practical recommendations rather than mandatory solutions; procedural maps, Apocalypse modifiers and item rolls can change the best answer.
Rewards
Drops, upgrades and how long a clear takes
There is no reliable evidence that the standard bosses use fixed, boss-exclusive equipment drop tables. After a successful night, rewards follow the game’s normal night and production systems, with item rarity and level affected by the current run, rank and available upgrades. Treat a boss victory as a progression gate and reward opportunity, not as a guaranteed legendary weapon.
The most important upgrade before a boss night is usually a functional upgrade: enough damage to kill a target in one turn, enough movement to reach the next target, or enough defense to survive while objectives are being cleared. Improve item-production buildings and buy consumables during the final day, but do not assume you can compensate for a missing damage profile after the fight begins.
There is no fixed answer to how long the game takes to beat. A first successful campaign can take many attempts and several hours because failed runs still teach map layouts, enemy priorities and meta-progression choices. Individual boss nights vary with map, difficulty, hero count and turn efficiency. Glintfein is deliberately compressed into seven nights, while Elderlicht is a longer preparation map.
- For a safer first clear, lower Apocalypse difficulty rather than sacrificing your only boss-killer to cover every lane.
- Use the final day to replace weak weapons, stock movement and damage potions, and repair the structures that protect the Magic Circle.
- If a boss survives with a small amount of health, check accuracy, armor or resistance before adding more raw damage. The problem is often the damage type, not the number on the weapon.
FAQ
Common questions
What is the first boss in The Last Spell?
The first standard campaign boss is the group of three Corrupted Harpies in Gildenberg: Aello, Celaeno and Ocythoe. You must defeat all three, not merely survive until one falls.
What is the second boss?
Cetusia the Putrescent Wyrm is the second standard boss, fought at the end of Lakeburg. The encounter uses repeated head-and-tail phases before the final head can be killed.
How do I beat the Dryad boss?
Glenwald requires twelve Putrefied Dryads to be defeated. Prepare mobile single-target heroes, keep a route through the map, remove only the obstacles blocking your attackers and avoid wasting the whole squad on plant summons.
Why can I not damage the dwarf boss?
The Enraged Dwarf Statues are protected while Corrupted Runestones remain. Destroy the runestones first, then continue the statue objective. Later runestones can appear, so keep movement and ranged coverage available.
Do bosses drop unique weapons?
Not as a guaranteed standard reward. Boss victories advance the map and provide normal night rewards, but the exact item results are procedural and affected by the run’s reward systems. Do not plan a build around receiving a named boss weapon.
What is the final boss?
For the base-game story, the final map is Glintfein and its concluding encounter is against Schaden and Freude in their later forms. DLC maps add separate end-of-map encounters, including Runenberg’s dwarf statues and Amberwald’s Gangrenous Fleshclouds.
Sources
What we checked
Official listings establish current availability and product facts. Community pages are used for mechanics and build history, then labeled separately.
- OfficialOfficial Steam announcement: Glintfein is the fifth and final base-game map
- OfficialOfficial Steam DLC listing with Runenberg, Amberwald and Tales of Torment release information
- ReferenceOfficial Steam patch information covering boss-night pacing and reward changes
- CommunityCommunity boss reference covering Harpies, Cetusia, Dryads, Archivist and dwarf statues
- CommunityCommunity reference for the Archivist’s Soul Vessel and throne phases
- ReferenceDeveloper announcement describing Amberwald’s Gangrenous Fleshclouds