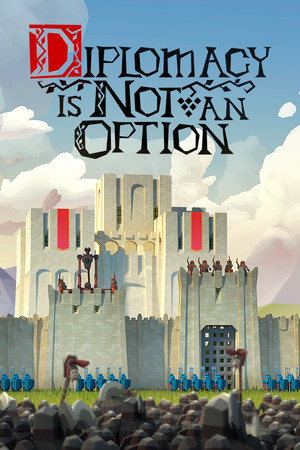
This guide gives strategic recommendations rather than a mission-by-mission walkthrough. Exact layouts, wave timing, and resource availability vary by map and difficulty. Check the objective panel before committing to a long build plan.
Fast answer
The answer before the background
Open with housing, food, wood, and basic storage. Add stone and iron as soon as workers can support them, then establish a compact defensive line on the safest approach. Do not spend every resource on walls: you also need ranged units, melee units, repairs, and population growth. Before each attack, pause, check the wave direction, group your army, and leave a reserve near the Town Hall or objective. In the campaign, complete the mission objective as soon as your economy is safe; in Endless Mode, expand only when the next wave is already covered. If you reach the Undead choice after meeting Ozzy, make a separate save before deciding because campaign progression records the branch choice.
Start here
A reliable opening plan
The safest opening is deliberately unglamorous. Place housing and food production first, add woodcutters, and keep builders working without creating a large unemployed population. Early food shortages can stall growth at the same time that you need workers, so watch food income rather than assuming the first farms or hunting buildings will be enough.
As soon as the basic economy is running, identify stone and iron access. Stone supports durable defenses and important infrastructure, while iron gates access to stronger military options. Do not rush every advanced building immediately. Your first goal is to reach the next attack with enough workers, food, and materials to repair or replace what the wave damages.
Use the first quiet period to scout. Reveal enemy camps, resource pockets, narrow passages, cliffs, and water. A short wall across a natural choke point is usually more valuable than a large wall enclosing empty land. Leave room behind the frontline for troops to move, and keep production buildings far enough back that one breach does not disable your entire economy.
A practical sequence is: establish food and wood, add storage and housing, secure stone, place a compact defensive line, unlock or construct ranged support, then add iron and heavier military production. Treat this as a priority order, not a rigid timer. Mission objectives and map resources may require changing it.
- Keep a small builder workforce available instead of assigning every villager to resources.
- Place resource buildings close enough to reduce travel time, but do not expose the entire economy to the first breach.
- Save a reserve of wood and stone for emergency walls, repairs, and replacement buildings.
- Use the active pause whenever several problems happen at once; fast decisions are less important than correct ones.
| Stage | Main job | What to avoid |
|---|---|---|
| Opening | Food, wood, housing, storage, and scouting | Overbuilding farms or military buildings before population and income are stable |
| Preparation | Stone, first defenses, ranged support, and a reserve | Building a wall so long that you cannot man or repair it |
| Expansion | Iron, stronger troops, extra production, and map control | Taking distant territory immediately before an announced wave |
| Late game | Layered defenses, replacements, and objective completion | Assuming one frontline can survive without reserves |
The game is officially described as a town-building and horde-defense strategy game. The build sequence above is a recommendation based on that economy-and-defense structure, not an official required order.
Defense
How to survive the first major waves
Think of a defense as three layers: terrain, structures, and units. Let cliffs, water, narrow passages, and map edges reduce the number of directions you must cover. Put walls or gates where they shorten the frontline, then position ranged units behind them. Keep melee troops close enough to counter enemies that reach the barrier, but do not mix every unit into one crowded blob.
A wall is time, not a victory condition. The purpose of the first line is to hold enemies in place while ranged units fire and workers repair. If the line is about to collapse, fall back to a second prepared position instead of sacrificing the whole army to save a single gate. A reserve can also intercept enemies that slip around the main defense or target workers and production buildings.
Before the wave arrives, select your army and create groups for frontline troops, ranged troops, and mobile units. Pause as the attack begins, identify the strongest cluster, and focus fire on units that threaten the wall or your ranged line. Reposition wounded or isolated units rather than allowing them to die while attacking a low-priority target.
After every assault, repair immediately, collect useful battlefield resources if the map allows it, replace losses, and inspect the next attack indicator. A defense that survives but leaves you with no food, iron, or trained units is only a delayed defeat.
- Build towers or other defensive structures where their firing lanes cover the approach, not where they look symmetrical.
- Keep ranged units from standing directly on the wall if the position makes them vulnerable to melee attacks.
- Use a mobile group to protect workers, repair crews, and exposed resource buildings.
- Do not chase fleeing enemies so far that your army loses the defensive position before the next wave.
| Problem | Immediate response | Long-term fix |
|---|---|---|
| Enemies reach the wall too quickly | Pause, focus fire, and send melee units to the breach | Shorten the approach with terrain or a second wall |
| Ranged units are being surrounded | Pull them behind the frontline and use a reserve | Create clearer lanes and protect both flanks |
| Workers are dying | Stop expansion and escort builders or relocate exposed production | Move the economy behind the main defensive line |
| The army wins but cannot recover | Repair, replace losses, and pause further expansion | Increase food, iron, and unit-production capacity |
The strongest position is usually the one that gives your units time to deal damage. A shorter, layered defense is generally easier to control than a giant perimeter.
Progression
Campaign, Endless Mode, and the Undead branch
Use the campaign to learn mission logic, objectives, and faction tools. Each map may ask you to defend, attack, escort, construct a special building, or survive under unusual economic pressure. Do not spend the entire mission perfecting a base if the objective can be completed safely earlier. Conversely, do not trigger a final objective while your defenses are still unfinished if the mission clearly warns that a large attack follows.
The current campaign system includes selectable starting bonuses. Door 407 describes bonuses such as free buildings, resources, units, unlocked research, and building modifications, with available choices and points tied to campaign progress and mission. For a first attempt, choose a bonus that fixes the mission’s opening bottleneck rather than one that only improves an already comfortable economy. You can also choose no bonuses for a harder start.
Endless Mode is better for practicing economy-to-defense pacing because the central task is to survive increasingly demanding attacks. Begin on a map with forgiving terrain and enough building room. Trident is officially described as an easier Endless map with a mountain range, a large valley, and three attack routes. Use those routes as a lesson in concentrating defenses rather than spreading walls across the entire valley.
The Undead route is a branch choice, not a generic toggle available from the beginning. Door 407 states that the choice follows the encounter with Ozzy. If you want to try it, save before the decision. The developer has also explained that a campaign save records the branch state, so replaying a mission after the choice may not recreate the decision point. The Undead faction changes the economic and military rhythm enough that it is best approached as a separate campaign plan, not as a normal-human build with different units.
- Campaign progression: learn the opening, identify the objective, stabilize the economy, then commit to the map’s required action.
- Endless progression: improve scouting and wave preparation before chasing maximum territory.
- Branch progression: keep separate saves before major choices, especially before switching sides.
- Achievement and trophy progress is safest when you follow the stated mission objective and avoid abandoning a run prematurely.
| Mode or branch | Best learning goal | Recommended mindset |
|---|---|---|
| Campaign | Objectives, events, and faction progression | Adapt the build to the mission |
| Endless Mode | Wave preparation and defensive efficiency | Expand only when the next attack is covered |
| Undead branch | Different economy and army behavior | Plan around faction mechanics, not human habits |
| Custom maps | Testing layouts and unusual challenges | Experiment after learning the standard defense loop |
The official announcements describe four campaign branches, including the Undead branch, and the 2026 update added campaign starting bonuses. Future DLC announcements are not included as playable base-game advice.
Troubleshooting
Common mistakes that stop good runs
The most common failure is expanding before the first defensive plan is complete. More land gives more resources, but it also creates more roads to defend and longer worker travel times. Secure one productive area, build a fallback position, and expand only when the next attack can be handled without abandoning the Town Hall.
Another mistake is treating population as automatically useful. Housing and food support growth, but unemployed villagers consume the economy and can leave you short on the materials needed for walls or units. Check worker assignments after every construction burst and replace idle workers with production or building tasks.
Many new players also overinvest in walls while neglecting ranged damage and repairs. A wall with no fire support merely gathers enemies. The reverse mistake is sending the army outside the base to clear every camp before the next wave. Clear only what improves your position or secures a necessary resource, and retreat before the next attack becomes urgent.
Finally, avoid restarting instantly after a setback. Pause and diagnose the failure. Was the issue food, a missing resource, an unprotected flank, poor targeting, or an objective triggered too early? If the economy is intact, a controlled fallback can still save the mission. Restart when the opening position is fundamentally bad, not because one building was damaged.
- Do not build every production chain at once; unlock the next military need, then return to the economy.
- Do not place important buildings at the edge of the map unless the mission requires it.
- Do not let the army fight without a retreat path.
- Do not ignore small enemy groups attacking workers or isolated buildings.
- Do not copy a community build order without checking its map, difficulty, and game version.
| Mistake | Why it fails | Better habit |
|---|---|---|
| Huge early perimeter | Too expensive to build and repair | Defend a short choke point |
| Too many villagers, too little food | Growth becomes a resource drain | Match housing and food to actual income |
| All army attacks forward | The base is exposed during the next wave | Keep a reserve and retreat route |
| Triggering objectives too early | The map may start a final assault before preparation | Read the objective and prepare first |
| Ignoring the pause button | Several small errors compound during combat | Pause, group, target, reposition, resume |
Exact wave timings, building costs, and best unit compositions depend on the selected mission, difficulty, and later balance changes. Use the in-game information panels as the final authority when a number or unlock differs from older community guides.
FAQ
Common questions
What should I build first?
Start with housing, food, wood, and storage, then secure stone and establish a compact defensive position. Add military production before expanding aggressively. The exact buildings vary by mission, but a stable economy and a defensible approach are more important than rushing advanced technology.
How do I defend against large hordes?
Make the enemy approach through a short route, place walls or gates at that route, and support them with ranged units and melee reserves. Repair during and after the fight, focus fire on the most dangerous attackers, and fall back to a second line instead of losing the entire army at a collapsing wall.
Is Endless Mode good for beginners?
Yes, if you choose a forgiving map and treat the first attempts as practice. It teaches scouting, wave preparation, and economic pacing without requiring you to learn every campaign objective. Trident is described by the developer as an easier map with natural terrain and three main attack routes.
How do I play as the Undead?
Progress through the campaign until the encounter with Ozzy, then choose to join the Undead when the option appears. Save before making the choice because the campaign records the branch state. The Undead path should be learned as a separate faction style rather than copied from the human opening.
Are old community guides still reliable?
They can explain fundamentals, but verify map names, branch access, removed challenges, starting bonuses, and balance-sensitive details against current official announcements and the in-game interface. A guide that predates the full release or later updates may describe content or timings that no longer apply.
Sources
What we checked
Official listings establish current availability and product facts. Community pages are used for mechanics and build history, then labeled separately.