Boss names, exact statistics, scripted attack patterns, and fixed drops are not fully documented in the official public materials I could verify. The recommendations below distinguish confirmed game systems from community observations.
Fast answer
The answer before the background
A first clear is commonly estimated at about six hours, but that is a completion estimate rather than the length of one uninterrupted shift. The core challenge is surviving repeated runs while improving your card pool and learning which structures cover each enemy group. Bosses should be handled as high-health pressure tests: keep a coherent damage type, combine wide area coverage with reliable single-target damage, and do not let fast support enemies distract every weapon from the main threat. The game officially describes wages and new cards as progression rewards, but I could not verify any boss-specific weapon, card, currency, or fixed drop. Some community reports describe tank-style bosses that launch fast sinner-shell support units; use that as a warning, not as a confirmed universal boss rule.
Before the fight
What counts as a boss encounter
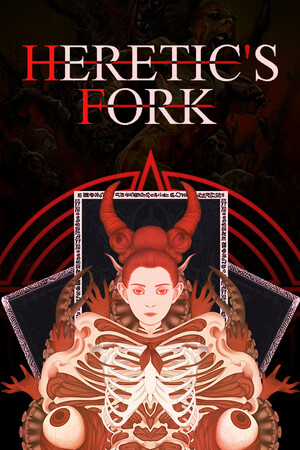
Heretic's Fork is a deck-building tower-defense game in which you manage a hellish defense system, place structures, and stop sinners from reaching your property. The official store description confirms three broad damage families: Holy, Unholy, and Hellfire. It also confirms that successful work earns wages based on punished sinners and can provide more cards for your deck.
Public references do not expose a complete official list of bosses, their health values, or a universal encounter schedule. In practice, the boss problem is recognizable even when the enemy name is not: a durable target absorbs damage while ordinary enemies continue advancing. That makes preparation more important than reacting after the boss reaches the center.
- Watch the wave and end-of-shift indicators rather than assuming every durable enemy is a final boss.
- Keep at least one structure that can damage a concentrated target and one that can clear groups.
- Do not spend every useful card immediately if doing so prevents a needed merge on the next draw.
| Verified system | Practical meaning |
|---|---|
| Holy, Unholy, and Hellfire damage | Choose upgrades that reinforce the damage family your deck is already using. |
| Towers and garrisons | Towers provide direct structure damage; garrisons add allied units with different movement and attack behavior. |
| Card-based progression | A poor early hand can be recovered, but a scattered deck makes later boss waves less reliable. |
| Wages and additional cards | These are confirmed progression rewards; a fixed boss loot table is not publicly verified. |
The Steam page confirms the overall systems and progression loop. Community guides add practical build advice, but they should not be treated as official documentation for exact boss mechanics.
During the encounter
The safest boss plan
Start by protecting your damage concentration. A community strategy guide recommends committing to a coherent type such as Towers, Holy, Unholy, or a narrower combination such as Holy Towers. This is sound because a mixed deck can leave several structures receiving upgrades that do not improve the weapon doing most of the work.
Area damage matters because bosses rarely arrive alone. The strongest single-target structure can still fail if lesser enemies leak around it or if every projectile is pulled toward a fast support unit. At the same time, pure area damage may take too long to remove the durable target. Use one role to thin the crowd and another to keep pressure on the boss.
Do not treat garrisons as a universal answer. They can add useful bodies and damage, but their behavior is more conditional than a stationary tower. Repenters, for example, are described by the community wiki as contact-based explosive units that perform well against bosses or groups of fragile enemies but can be overwhelmed by medium enemies. That makes them a supplement, not a complete plan.
- Before the boss arrives, merge toward a strong core instead of filling every slot with unrelated low-tier cards.
- Prioritize damage first when the current wave is already reaching the tower; range and area upgrades are valuable only if they improve coverage soon enough.
- Keep a fast, dependable damage source for the main target and a broad attack for escorts.
- If the screen becomes crowded, improve the build immediately rather than saving cards for a perfect future hand.
| Threat | Best response |
|---|---|
| High-health boss | Sustained single-target damage, upgraded damage bonuses, and enough range to keep firing while support enemies approach. |
| Large ordinary wave | Area of effect, piercing attacks, or garrisons that can engage several targets. |
| Fast support enemies | Coverage across the approach path; do not rely only on slow attacks aimed at one location. |
| Spread-out enemies | Long range or mobile garrisons; line attacks and melee units lose value when targets are separated. |
The role assignments above are tactical recommendations based on documented structure behavior and player strategy guides. They are not confirmed boss weaknesses.
Counters and support enemies
How to answer the tank-boss problem
The clearest public report about boss behavior comes from the game's Steam community area. A player describes tank-like bosses that send very fast, highly durable sinner-shell units. The report also says those shells can draw tower and garrison attacks away from the boss and can destroy fragile Repenters. This is a player observation, not a developer-confirmed encounter table, but it identifies the kind of failure that ruins a promising run.
If you see a similar pattern, avoid building a defense that depends on one slow attack or a single wave of kamikaze units. Add coverage that can hit several lanes or targets, then preserve enough direct damage to bring down the durable enemy. If your structures repeatedly retarget the support units, the answer is usually more range, piercing, area coverage, or a better-positioned structure rather than simply adding another fragile melee unit.
The community garrison reference describes several useful contrasts. Slashers have heavy damage and infinite pierce but struggle against spread enemies. Fallen Crusaders apply wide Holy area damage but have relatively weak individual damage. Snipers offer long-range, heavy Holy damage and are useful against grouped enemies and bosses, but their slow attack speed makes them poor against scattered rushes. These distinctions are more useful than chasing a supposedly universal boss counter.
- Against durable escorts, favor attacks that continue through a line or affect an area.
- Against spread formations, use range and coverage instead of relying on piercing alone.
- Against a boss surrounded by fragile units, let area damage clear the escort while single-target pressure stays on the boss.
- If Repenters are being intercepted before reaching the boss, stop treating them as your only finisher.
| Community-reported tool | Strength | Limitation |
|---|---|---|
| Repenters | Fast contact explosions; useful against bosses or fragile groups | Can be overwhelmed by medium enemies and may be stopped by durable escorts |
| Slashers | Heavy melee damage with infinite pierce | Struggle when enemies are spread out |
| Fallen Crusaders | Large Holy area coverage | Weak individual damage |
| Snipers | Long range, heavy Holy damage, and boss pressure | Slow attacks are unreliable against scattered rushes |
These enemy and garrison descriptions come from community documentation. The public official store page confirms the existence of structures and damage families but does not publish these detailed unit statistics.
Rewards and progression
Drops, wages, and what you actually keep
Do not enter a boss fight expecting a traditional chest, equipment roll, or named boss weapon. I could not verify a public fixed drop table for Heretic's Fork. The official store description instead frames progression around wages for each shift and receiving more cards after achieving good results. That means the practical reward for a successful boss encounter is run progress and account or deck development, not a confirmed boss-exclusive item.
Because this is a roguelite deck-building structure game, a failed run can still teach you which cards and damage families are worth keeping. Community guides also describe merging equal-level cards and building toward higher-tier structures. In the late stages, one strategy guide recommends upgrading the cards already in hand rather than waiting for ideal future draws, because enemy waves become too large to ignore.
If a patch, event, or downloadable content adds a named reward later, verify it against the current Steam news or developer announcement before treating it as a standard boss drop. The public sources checked for this guide do not establish such a table.
- Record which structures survived the encounter, not only which one dealt the final hit.
- Spend wages and unlock rewards on improving consistency rather than chasing one unverified boss item.
- Use later runs to refine the deck so your first useful damage family appears earlier.
- Treat community claims about guaranteed drops as unconfirmed unless a developer or current in-game description supports them.
| Reward type | Status |
|---|---|
| Shift wages | Confirmed by the official store description. |
| Additional cards | Confirmed as a progression outcome for successful results. |
| Boss-specific equipment | No fixed public source verified. |
| Boss-specific currency or card | No fixed public source verified. |
The fight is valuable because it tests and advances your deck, not because a documented loot chest is waiting afterward.
Time commitment
How long a full clear usually takes
A third-party aggregation of HowLongToBeat data lists approximately six hours for the main story, twenty hours for main content plus sides, thirty hours for completionist play, and fourteen hours across all play styles. These figures are community-tracked estimates rather than a developer guarantee. They also make sense for a roguelite: one run may be relatively short, but failed attempts, unlock hunting, achievements, and higher difficulty settings extend the real commitment.
A Steam community review similarly describes individual runs as taking around an hour and a full clear as requiring multiple successful runs. Use that as a planning estimate, not a rule. Your first successful shift can take longer while you learn the card economy, and later runs can be faster once the deck and structure pool are familiar.
For a first session, plan for one complete run rather than expecting a short campaign chapter. If you only want to see the main progression, six to ten hours is a reasonable working range; completion and experimentation can go well beyond that.
- Main progression estimate: about six hours according to aggregated player data.
- Main progression with retries and learning: often longer than the headline estimate.
- Completionist play: roughly thirty hours in the same aggregation, with substantial uncertainty.
- Individual shifts: community reports commonly place them near an hour, but run length varies.
| Goal | Planning estimate | Confidence |
|---|---|---|
| Reach the main ending | About six hours | Moderate; based on aggregated player data |
| Play side content and experiment | About twenty hours | Moderate; player-reported estimate |
| Complete most or all content | About thirty hours | Moderate to low; completion standards vary |
| One normal shift | Around one hour in a community report | Low to moderate; build and difficulty affect duration |
These time estimates were checked on August 30, 2026, but they are player averages and can change as more playtime is recorded.
FAQ
Common questions
Does Heretic's Fork have a confirmed boss list?
Not in the public official materials I could verify. Community discussions clearly refer to tank-style bosses, but they do not establish a complete roster, universal order, or exact statistics.
What is the best boss counter?
Use a coherent damage family with both area coverage and sustained single-target pressure. Avoid relying only on slow line attacks, fragile Repenters, or a single structure that can be distracted by support enemies.
Do bosses drop unique items?
No fixed boss-specific drop table was verified. The official description confirms shift wages and additional cards as progression rewards, so assume ordinary run progression unless an in-game or developer source states otherwise.
Are Repenters good against bosses?
They can be effective when they reach the target because they explode on contact, and community documentation specifically notes their boss potential. However, they can be overwhelmed or intercepted, so pair them with reliable tower damage and crowd control.
Is six hours enough to finish the game?
It is a reasonable main-story estimate from aggregated player data, not a promise. Retries, unlocks, achievements, higher difficulties, and completionist goals can make the total much longer.
Sources
What we checked
Official listings establish current availability and product facts. Community pages are used for mechanics and build history, then labeled separately.
- OfficialOfficial Steam store page for Heretic's Fork
- CommunitySteam Community guide: So you want to punish Sinners
- CommunityHeretic's Fork Wiki: Garrisons
- CommunitySteam Community discussion: Tank bosses issue
- ReferenceHeretic's Fork strategy guide and completion estimates
- ReferenceAggregated HowLongToBeat statistics