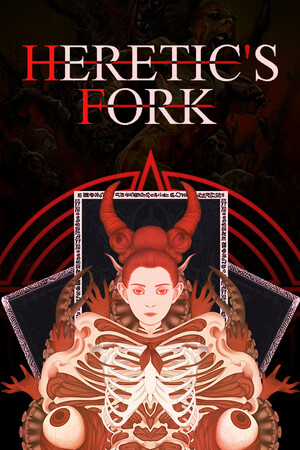
This guide discusses repeated runs, permanent failure, difficult Torment levels, and randomized card choices.
Fast answer
The answer before the background
For a dependable first route, use John Fenriz, start with Judgement or Sin Spotter, and add Dark Marker as soon as it appears. Build tower damage first, then attack speed, range, pierce, and the matching Holy, Unholy, or Hellfire damage. Keep at least one sustain option, such as healing, shielding, or a curse-based recovery effect. If you prefer a different style, use Fenriz for flexible towers, a garrison-focused employee or variant for Repenters and Guns of God, Gilbo for Luck and Gamble, and Niya for a high-risk draw-and-energy route. Treat these as route templates rather than fixed tier lists because card draws, variants, and Torment level determine the final result.
Verified basics
How classes and builds actually work
Heretic's Fork does not use a conventional class tree with permanent stat points. You choose an employee, receive that employee's starting setup or ability, and then shape the run through cards, structures, actives, and upgrades. The official achievement list confirms employees including Intern Ruby, John Fenriz, Denny Fox, Niya Biblyat, Greezy, Unknown, and Gilbo Gibbins. Character variants are separate from the base employees and can change the recommended route.
The core distinction is between towers and garrisons. Towers attack directly from the central structure, while garrisons create allied units. The two families do not value every bonus equally, so read the scaling text on each structure before committing. A card that increases tower damage is not automatically useful for a Repenter or Guns of God plan, and a garrison bonus can be wasted in a pure tower run.
There is no single verified best build for every employee. Community clears commonly favor Judgement, Sin Spotter, Dark Marker, Sunder, crit routes, and selected garrisons, but those reports are recommendations rather than developer rankings. Use them as starting points and adapt when the run offers a stronger, coherent package.
- Intern Ruby is the baseline choice. She has no special ability and is useful for learning card flow.
- John Fenriz is the most forgiving generalist. His extra structure space increases early output, and his Locksmith ability can lock sacrifice slots for energy.
- Denny Fox gains Repent, allowing a hand redraw once per turn while leaving sacrifice-area cards in place.
- Niya Biblyat gains Dark Bargain, trading health for an extra card and additional energy. Healing or shielding makes this route safer.
- Gilbo Gibbins uses Gamble, whose outcomes are influenced by Luck. This is powerful but more swingy than Fenriz.
- Unknown and the other named employees have specialized mechanics or variants that should be confirmed from the in-game character screen before copying a route.
| Employee or route | Best use | Main caution |
|---|---|---|
| John Fenriz | Flexible tower starts and difficult Torments | Do not spend every early card on extra structures if your damage is falling behind. |
| Intern Ruby | Learning the basic system or testing a new deck | The lack of a special ability makes weak early draws more punishing. |
| Denny Fox | Card cycling and active-heavy strategies | Redrawing does not replace cards already placed in the sacrifice area. |
| Niya Biblyat | High-value draw and energy turns | Dark Bargain can become fatal without recovery. |
| Gilbo Gibbins | Luck, Gamble, and high-roll runs | Bad outcomes are more costly when the deck lacks a stable damage core. |
| Garrison route | Repenters, Guns of God, or other allied-unit plans | Tower-only bonuses and slow-spawn setups dilute the build. |
The employee abilities above are documented by the achievement guide and official announcements. The route advice, ranking language, and preferred card combinations are recommendations based on observed community strategies, not official balance rankings.
Stats
Which stats to prioritize
The most important stat is the one your active structure scales with. Before taking a generic bonus, hover over the tower or garrison and check whether it benefits from tower damage, garrison damage, structure damage, attack speed, spawn rate, range, projectiles, projectile speed, pierce, elemental damage, or another category. This prevents the common mistake of building attractive numbers that do not improve the weapon carrying the run.
For a normal tower route, the practical order is structure or tower upgrade, direct tower damage, then enough area coverage to prevent leaks. Attack speed and projectile count become stronger after the tower already has adequate damage. Range and pierce are situational: range helps coverage and pierce helps dense lines, but neither fixes a weapon that cannot kill targets quickly enough.
For garrisons, prioritize the bonuses that affect the unit itself. Spawn rate is often more important than adding a small amount of unrelated tower damage, while lifespan or garrison health can determine whether allied units survive long enough to matter. A garrison route also needs crowd control or a second source of damage because one unit type can struggle against a bad enemy mix.
Luck is a specialist stat. It is especially valuable for Gilbo and for routes that convert Luck into critical chance or improve card outcomes. Crit is usually a better mid-to-late-run investment after your basic damage is secure. Active recharge is excellent when your plan depends on healing, curse effects, protection, or other powers, but it should not replace early structure strength.
Elemental damage is strongest when the deck and structures are already aligned. Holy, Unholy, and Hellfire bonuses can support focused runs and challenge objectives, but mixing several damage types without a reason spreads your upgrades too thin.
- Early priority: upgrade a real damage structure and secure enough damage to survive the next circle.
- Mid-run priority: add attack speed, range, pierce, projectiles, or spawn rate according to the structure carrying you.
- Late priority: specialize into crit, Luck conversion, active recharge, elemental damage, or garrison scaling.
- Defensive priority: take healing, shielding, curse recovery, or on-hit protection before greedily adding another multiplier.
| Build type | Core stats | Usually delay |
|---|---|---|
| Tower damage | Tower or structure damage, upgrade level, attack speed, range, pierce | Luck and small crit bonuses before the tower is online |
| Garrison | Garrison damage, spawn rate, lifespan or health, suitable range | Generic tower bonuses |
| Crit and Luck | Luck, crit conversion, matching damage, active support | Pure crit before base damage and survival |
| Active control | Active recharge, energy, draw or redraw effects, sustain | Narrow elemental bonuses that do not support the actives |
If a card improves a stat but does not affect the structure carrying your current run, it is usually a sacrifice candidate. Recheck after adding a new tower or garrison because the best stat can change.
Build routes
Four practical routes to follow
The stable tower route is the best starting point. Choose Fenriz when available, begin with Judgement, Sin Spotter, or Sunder, and use Dark Marker or another sustain tool when offered. Keep one reliable area-damage option and one weapon that handles tougher targets. Upgrade the best structure instead of spreading low-tier cards across several mediocre weapons. This route is especially useful while learning enemy patterns and card values.
The curse-and-recovery route uses Dark Marker as the engine. Add cards that mark or curse enemies, then take effects that restore health or otherwise reward cursed targets. The build is not simply a damage route; its value is that survival lets your main tower keep scaling. Do not rely on the recovery effect before you have enough damage to trigger it consistently.
The garrison route starts from Repenters, Guns of God, or another compatible garrison. Take spawn-rate and garrison-damage support, then look for lifespan or defensive help. Use a tower only when it solves a problem the garrisons cannot, such as poor area coverage or a dangerous elite. This route is more dependent on the correct card pool than the stable tower route, so avoid forcing it after the early offers point elsewhere.
The crit-and-Luck route is best for Gilbo or a variant that already rewards Luck. Build a damage foundation first, then stack Luck and take a reliable conversion or critical effect when it appears. Use Gamble when the expected reward is worth the risk, not automatically on every offer. If the run has no stable tower by the second circle, switch back toward direct damage rather than waiting for a perfect high roll.
For a one-element challenge, select one damage family and remove or ignore cards that pull you toward another. The official game objectives include Holy, Unholy, and Hellfire-only clears, but a focused elemental route still needs ordinary tower scaling, crowd control, and sustain. Elemental percentage alone will not rescue an under-upgraded structure.
- Before the first difficult circle, identify one primary damage structure and one emergency survival tool.
- Merge cards when the upgrade immediately improves your carrying structure; do not merge blindly just to clear space.
- Use the sacrifice area to protect cards that complete your route, especially when playing Denny or Fenriz.
- At higher Torments, value reliable damage and sustain over a theoretically stronger build that depends on several rare cards.
| Route | Suggested starting idea | Switch if |
|---|---|---|
| Stable towers | Fenriz with Judgement, Sin Spotter, or Sunder | Your offers strongly favor compatible garrisons or a special variant mechanic |
| Curse recovery | Dark Marker plus a damage tower and healing or shield support | Curse effects arrive too late or your damage cannot trigger them |
| Garrisons | Repenters or Guns of God with spawn and lifespan support | The run gives only tower multipliers or poor garrison upgrades |
| Crit and Luck | Gilbo with Luck, a damage core, and crit conversion | You lack direct damage or the Gamble risk is costing too much health |
Restarting is reasonable when the opening cards provide no damage, no upgrade path, and no survival tool for the selected character. It is not necessary to abandon a run merely because the first hand is imperfect; a coherent mid-run pivot is often stronger than chasing one named card.
FAQs
Common build questions
FAQ
What is the best beginner class?
John Fenriz is the best recommendation for most new players because extra structure space and sacrifice-slot control reduce the impact of bad draws. Intern Ruby is still useful if you want to learn the unmodified baseline, but she offers less room for error.
FAQ
Should I build towers or garrisons?
Build whichever family receives the better early cards and scaling. Towers are usually easier to stabilize because their damage is immediate. Garrisons can work very well when spawn rate, lifespan, and garrison damage arrive together, but mixing the two families without a clear reason wastes upgrades.
FAQ
Common questions
Is there one strongest build for every employee?
No. Employee abilities, variants, Torment level, and card availability change the correct route. Stable tower builds are the safest default, while garrison, Luck, and active-focused routes are more conditional.
When should I take crit or Luck?
Take direct damage and a workable structure first. Add crit or Luck once the run can survive the next circle and your deck contains a reliable way to convert the stat into damage or card value.
How do I make Niya Biblyat consistent?
Use Dark Bargain only when the health cost is safe, and prioritize healing, shields, regeneration, or curse-based recovery. Do not treat the extra card as free energy if it leaves the tower one hit from defeat.
Does attack speed matter more than damage?
Usually not at the start. Upgrade the structure and secure direct damage first. Attack speed becomes more valuable after the weapon can already kill ordinary enemies and needs more throughput against dense waves.
Are community Torment builds guaranteed to work?
No. Community reports are useful evidence for patterns, but they are not official rankings or guarantees. Card draws, unlocked content, balance changes, and character variants can all change the result.
Sources
What we checked
Official listings establish current availability and product facts. Community pages are used for mechanics and build history, then labeled separately.
- OfficialOfficial Steam store page
- OfficialOfficial Steam announcements and patch history
- OfficialOfficial developer announcements covering employees and variants
- ReferenceSteam achievement list with employee abilities and completion objectives
- CommunityCommunity Torment strategy discussion
- CommunityCommunity discussion on character abilities and beginner strategy