This guide discusses enemy types, late-wave bosses, and community-reported mechanics. Some exact boss names, spawn timings, and reward details remain unverified.
Fast answer
The answer before the background
There is no verified fixed boss list or universal boss-wave schedule that applies to every run. Encounters are generated through escalating enemy waves, with the lineup depending on the wave and difficulty. To beat them, shape a long route around your strongest firing positions, slow or stall the front of the pack, add area damage for escorts and splitters, and reserve focused damage for the largest target. Bring detection if the wave can contain camouflage and reliable anti-air coverage. Defeated enemies provide normal combat resources such as supply, while post-wave rewards can include doctrines, blueprints, or currency. A boss-specific item table has not been reliably documented.
Verified basics
How boss encounters work
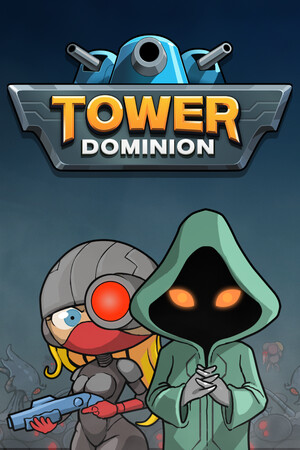
Tower Dominion is a roguelike tower-defense game built around procedural terrain, enemy waves, and adaptive upgrades. The official store descriptions confirm four standard difficulty levels on Steam, while the later Nintendo listing describes five difficulty levels and additional endgame challenges. That platform difference is important: do not assume a Steam run and a console run use identical wave counts or unlock rules.
The community wiki states that each wave draws enemy types and quantities from the wave and that enemy swarms are distributed across all entry points. It also describes the final wave as receiving a random malus. In practice, this means a boss is not a conventional arena fight with a fixed script. You must defend the whole route and keep enough damage available for the enemies accompanying the large target.
Community reporting identifies roughly 11 bosses in the broader roster, but that number comes from a player review rather than an official roster. The safest evidence-led conclusion is that the game has powerful boss-class enemies, but a complete, authoritative name-by-name list and fixed encounter schedule are not currently verified. If your Codex displays a different count, use the in-game entry as the current authority.
- Expect variation between runs rather than one guaranteed boss at a named level.
- Entry points matter because enemy pressure is divided among them.
- The last wave may carry an additional random penalty, so avoid spending every resource before it starts.
| Question | Verified answer | What remains uncertain |
|---|---|---|
| Are bosses fixed to one level? | No universal schedule is verified; wave composition depends on progression and difficulty. | The exact boss wave for every difficulty and platform. |
| Do all enemies use one route? | No. Swarms can arrive through multiple entry points. | The precise weighting for each enemy group. |
| Is there a final-wave modifier? | The community wiki reports a random final-wave malus. | Whether every platform and mode uses the same modifier pool. |
Treat named boss lists, exact health values, and guaranteed wave numbers as unverified unless your current Codex or an official patch note confirms them.
Practical strategy
How to beat difficulty 4 and late waves
Difficulty 4 starts with 10 Tech according to the community reference, the same starting amount reported for Frontier mode. That does not make it an early-game damage check alone; it makes efficient specialization more important. Spend early resources on a defense that can survive ordinary waves, then commit Tech to a small number of upgrades that solve a known weakness.
The strongest general layout is a long, bending route with repeated exposure to your best towers. Avoid a single short straight lane unless your build specifically rewards it. A longer route buys reload cycles, lets slow effects work repeatedly, and gives the headquarters a final safety zone. Keep your most reliable damage near the back as well as the front, because a boss that survives the first pass can arrive with escorts.
Use four layers of coverage. First, add control such as slowing, path manipulation, or a durable blocking point. Second, use area damage for escorts and newly created enemies. Third, add focused damage for the boss itself. Fourth, cover special defenses such as camouflage and air movement. The exact tower names and upgrade paths depend on faction and available blueprints, so copy the role rather than forcing one build.
For splitters, do not rely on one large hit. Community advice repeatedly points toward multi-target and repeated-fire setups, with Warwolf positions, Durendals, Bastions, or Retribution-style damage cited as possible answers. These are recommendations, not universal requirements. Watch the live damage ranking when available and replace towers that look impressive but contribute little against the current wave.
- Reserve a rear kill zone instead of filling every tile with forward damage.
- Do not let a boss and its escorts reach the headquarters together; stall the escort pack or eliminate it first.
- Check target priority and detection before the boss wave begins.
- Use terrain to make enemies revisit the same firing arcs rather than splitting your damage across several weak lanes.
- On difficulty 4, prefer a dependable build with overlapping coverage over a high-roll combination that needs perfect rewards.
| Threat | Counter role | Reason |
|---|---|---|
| Large boss | Focused, sustained single-target damage | Prevents a high-health target from surviving the full route. |
| Splitter | Multi-target fire and repeated damage | The death event can create additional enemies, so overkill alone is inefficient. |
| Camouflaged enemy | Detection or a unit that can attack hidden targets | Undetected enemies can bypass otherwise strong firing lines. |
| Air unit | Dedicated anti-air coverage | Ground-only defenses may leave a separate approach unanswered. |
| Boss escort swarm | Area damage plus slow | Reduces the chance that smaller enemies hide the boss or overwhelm the back line. |
Weapon performance changes with faction, doctrine, terrain, and patch balance. Test the build in the Codex or an earlier wave before committing to it for the final encounter.
Rewards and progression
Drops, blueprints, and Mission Control
The reliable reward pattern is broader than boss loot. The community reference lists supply as a resource gained by killing foes, and describes a reinforcement phase after each wave where players choose from rewards such as doctrines, blueprints, or currencies. Those are the rewards to plan around because no authoritative boss-specific item or drop-rate table has been found.
Mission Control is a blueprint-oriented building. The community wiki describes it as adding a control extension to the main building, and its building reference says Mission Control and certain doctrines can provide more blueprints during a run. The exact placement requirements, upgrade effects, and costs should be read from the current building panel because community discussions show players have disagreed about how its extensions and adjacent structures interact.
Use Mission Control when your defense benefits from more construction choices and you can protect the building without sacrificing the main kill zone. It is less attractive when spending its Tech delays the damage, detection, or control upgrade that solves the next wave. In other words, it is an economy and flexibility tool, not a direct boss counter by itself.
If a boss dies and no special item appears, that is not evidence that the encounter failed to reward you. The documented baseline is normal combat income and the ordinary end-of-wave selection system. Record the wave, difficulty, faction, and platform if you believe a unique reward dropped; isolated community reports are not enough to establish a universal table.
- Treat supply from kills as the dependable combat income.
- Treat post-wave blueprint and doctrine choices as the main strategic reward.
- Build Mission Control for flexibility, not as a substitute for damage or detection.
- Verify current upgrade text in the Codex before spending scarce Tech.
| Reward type | Status | How to use it |
|---|---|---|
| Supply | Verified as a resource gained from killing foes. | Fund construction and upgrades during the run. |
| Blueprints | Verified as a normal reinforcement choice and potentially increased by Mission Control. | Expand the set of buildings available to your strategy. |
| Doctrines or currency | Official store copy confirms post-wave upgrades and rewards; exact pools vary. | Reinforce the build’s main damage or control plan. |
| Boss-specific item | Not reliably verified. | Do not plan a run around an assumed drop. |
The building’s role is supported by the community reference, but exact bonuses and adjacency behavior are version-sensitive. Use the current in-game description as the final source.
Run planning
Level 3, level 4, and level 100 expectations
Searches for level 3, level 4, and level 100 are easy to misread because Tower Dominion uses waves, difficulty levels, and extended or Frontier-style modes rather than one simple campaign ladder. The official descriptions confirm multiple difficulties and an endless or extended endgame, but they do not establish that “level 100” is a standard story checkpoint.
For a level 3 or level 4 attempt, think in terms of a run’s target wave and the quality of your scaling. A build that clears early waves can still fail when enemy health, speed, special traits, or boss escorts outgrow its damage. Start scaling before the defense looks desperate, and use the final third of the route as insurance rather than as an afterthought.
If you are chasing wave 100, treat it as an endurance project. Prioritize repeatable damage multipliers, efficient target coverage, reliable control, and enough economy to keep upgrading. Because no official source reviewed here publishes a universal wave-100 boss schedule, do not use a claimed boss order from another platform as a guarantee.
- Separate difficulty number from wave number when comparing guides.
- Use the Codex and your own run log to track platform-specific changes.
- For endurance goals, optimize consistency and scaling before short-term burst damage.
FAQ
Common questions
How long does it take to beat Tower Dominion?
There is no single verified completion time because runs are wave-based, procedural, and mode-dependent. A standard run ends according to the selected difficulty, while extended or Frontier-style play can continue much longer. Use the target wave and your average wave duration rather than a campaign-hour estimate.
How do I beat level 4?
Build a long route, protect a rear kill zone, and cover the four essential roles: control, area damage, focused damage, and detection or anti-air as needed. Difficulty 4 begins with 10 Tech in the current community reference, so spend it on a clear weakness instead of spreading upgrades across too many buildings.
How do I beat level 3?
Level 3 is usually a better place to test your route and economy than to copy a boss build blindly. Make sure every entry point reaches overlapping fire, keep a reserve of supply for emergency upgrades, and inspect which tower is actually dealing damage before the late waves.
What drops from bosses?
A fixed boss-only drop table is not reliably verified. Plan around supply from kills and the normal reinforcement rewards, including blueprint, doctrine, or currency choices. If your platform shows a unique reward, confirm it in the Codex or a current patch note before treating it as universal.
Is Mission Control worth building?
It can be worthwhile when extra blueprint opportunities improve your run and you can afford the Tech without weakening immediate defenses. It is not an automatic boss counter. Read the current upgrade text and compare its flexibility against a direct damage, control, detection, or economy upgrade.
Sources
What we checked
Official listings establish current availability and product facts. Community pages are used for mechanics and build history, then labeled separately.
- OfficialSteam store page and publisher description
- OfficialNintendo publisher-provided product description
- CommunityTower Dominion community wiki: gameplay overview
- CommunityTower Dominion community wiki: Mission Control
- CommunityTower Dominion community wiki: Buildings
- CommunityTower Dominion community wiki: Tech
- CommunityTower Dominion community discussion about splitters