Some recommendations are evidence-led but not official tier rankings. Blueprint offers and map tiles are random, so no route guarantees a particular tower in every run.
Fast answer
The answer before the background
The safest general route is to begin with Miradors and Sturdy Bunkers, place your important weapons on height 2 or 3, and upgrade a small core instead of building every blueprint. Pick a commander whose powers support that plan, then choose doctrines that improve supply, range, reload speed or the damage type your current towers need. For the three-Howitzer challenge, favor a faction or commander that increases blueprint opportunities, select Slovek Howitzer whenever it appears, and shape a long, narrow enemy route so artillery gets repeated firing opportunities. Exact weapon numbers can change, so use the game’s advanced stats rather than relying on old tier lists.
FOUNDATION
How the classes and factions change your opening
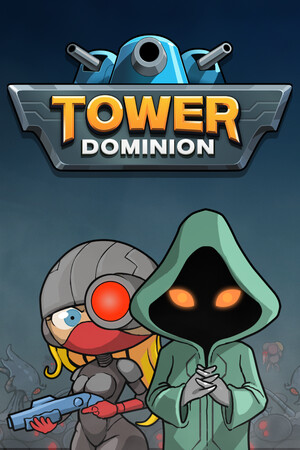
Tower Dominion does not use traditional combat classes in the usual RPG sense. Its practical classes are the factions, commanders and building packages you combine for a run. The game has three factions and 30 heroes, with 10 unique heroes per faction. Each faction supplies different biomes, towers and strategic incentives, while each commander contributes two positive powers.
For a dependable first route, choose a commander whose starting bonus helps the Headquarters, early blueprints or resource flow. A beginner reference identifies Sergeant Gurtag as an Iron Dragoons option because his powers strengthen the HQ, Siege Master Obivim as a Pargan option because he starts with five bunkers, and Denshikova as a straightforward Lions choice. These are recommendations, not universal rankings.
The faction choice also affects your build identity. Iron Dragoons are a natural fit for a compact HQ-centered defense. Pargan Assault Group favors bunker and barricade control. Lions of Ravelski are more attractive when you want to exploit blueprint quantity or artillery access, although the exact strength of that route depends on the commander and current offers.
- Choose an HQ or bunker-focused commander when learning the game.
- Choose a blueprint-focused commander when hunting a specific tower or unlock.
- Do not select a commander only because of a single high-tier tower; the early waves still decide whether the route survives.
| Route type | Best use | Main risk |
|---|---|---|
| HQ and bunker core | Safe early waves and compact maps | Can lack long-range damage later |
| Blueprint and artillery | Specific unlocks, Howitzers and high-impact towers | Depends heavily on random offers |
| Barricade and choke control | Ground-heavy waves and narrow lanes | Weak if air coverage is ignored |
| Mixed range defense | Blind runs and uncertain enemy types | Can dilute upgrade and doctrine offers |
Commanders are also called heroes in community references, but the game’s practical effect is the same: they modify a run through two powers rather than acting as a manually controlled combat unit.
OPENING ROUTE
A reliable step-by-step build order
Begin by placing the available Miradors and Sturdy Bunker near the HQ, but do not fill every tile immediately. The early goal is coverage and survival, not maximum structure count. A bunker beside the HQ can cover several approaches, while a Mirador on raised terrain gains a better firing position.
When a new tile becomes available, prefer a placement that lengthens one enemy route or creates a controlled choke point. Expanding in several directions can create extra battlefronts and more attack lanes. If the offered zone damages your plan, spending Recon to reroll can be reasonable, but preserve enough Recon for critical upgrades and later choices.
Once the first waves are stable, upgrade the strongest existing weapon before adding a second or third damage type. Add a Puma or another anti-air solution as soon as flying enemies become a threat. Against ground-heavy waves, add barricades, bunkers or area damage instead of blindly copying an air-defense package.
In the middle game, place mortars and Howitzers where they can see long lanes without being forced to shoot at nearby targets. Raised positions are particularly valuable for range-focused weapons. Keep a reserve of Supply for emergency upgrades because enemies can reach the HQ while the reinforcement phase is still several waves away.
- Early: Mirador coverage, one compact bunker cluster and a controlled lane.
- Transition: upgrade the best damage tower, then add air coverage before flying units overwhelm the core.
- Mid-game: add area damage or artillery behind the choke, not directly on the frontline.
- Late: improve reload, range and damage on the established core before opening unrelated tower branches.
| Priority | What to do | Why it works |
|---|---|---|
| 1 | Secure the HQ with Miradors and bunkers | Prevents early losses without overspending |
| 2 | Raise key towers to height 2 or 3 | Adds useful range and firing reach |
| 3 | Upgrade a small core | Concentrates damage and preserves resources |
| 4 | Cover air threats | Flying units can bypass a ground-only plan |
| 5 | Add artillery or area damage | Punishes enemies compressed by pathing |
The exact order may need one swap when the reinforcement screen offers an unusually strong tower, doctrine or resource reward. Adapt the sequence, but keep the principle of one strong core before broad expansion.
SKILLS AND STATS
How to choose doctrines and read weapon stats
The most useful skill choices depend on what your run is already doing. Negotiation Skills is a Tier 1 doctrine that increases Supply amounts offered during reinforcement by 50 percent. It is a strong economy choice when you need reliable building and upgrade purchases, but it does not directly increase weapon damage.
Do not confuse it with Negotiation Expertise. That name is associated with a building expertise effect that grants additional range to the relevant building route. In other words, Negotiation Skills helps the reinforcement economy, while Negotiation Expertise is a range-oriented building upgrade. Choose the former when resource offers are limiting you and the latter when the associated weapon is already part of your core.
For weapon stats, inspect the advanced-stat display in the game rather than trusting a generic tier label. Compare damage, rate of fire, reload speed, range, target restrictions, area coverage and air capability. A high-damage weapon can still underperform if it has poor target access or fires into a short lane. A lower-damage tower with excellent uptime can be better when enemies are constantly visible.
Height and path length are effective stat multipliers in practice. Height improves the value of range, while a longer route gives slow-firing artillery more opportunities to connect. Choke points also increase area-of-effect value because more enemies occupy the same attack space.
- Take supply-focused doctrines when you are short on build currency or expect many upgrades.
- Take range and reload effects for artillery and long-lane weapons.
- Prefer damage-type coverage over duplicate towers when the enemy roster is uncertain.
- Use the advanced display for exact values because public references do not provide a complete, patch-stable weapon table.
| Stat | What it changes | Build implication |
|---|---|---|
| Range | How far a weapon can acquire targets | Best on height 2 or 3 and long lanes |
| Reload or rate of fire | How often damage is delivered | Important for bosses and fast enemies |
| Damage | Impact per successful attack | More valuable when accuracy and uptime are reliable |
| Area coverage | How many enemies one attack can affect | Strong at chokes and compressed routes |
| Air capability | Whether flying targets can be engaged | Essential when the map cannot block air paths |
The reviewed sources identify many buildings and doctrine names, but they do not establish a complete official weapon-stat database. Treat numerical values shown in older guides as provisional after balance updates.
OBJECTIVE ROUTE
How to build three Howitzers consistently
The three-Howitzer objective is best approached as a blueprint-farming run rather than a normal balanced clear. Community reports consistently recommend a commander or faction that increases blueprint opportunities, then selecting Slovek Howitzer whenever it appears. One reported route uses the red faction because its reinforcement setup can provide extra blueprint rolls, while another recommends Eleonor for earlier Howitzer access and additional blueprint opportunities.
The exact unlock condition and counting behavior are not fully documented in an official source reviewed here. Community reports state that the three Howitzers must be completed during the normal rounds and that Howitzers placed only in Endless mode may not count. Treat that as a strong community warning, not an official guarantee.
Start with enough Miradors, bunkers or barricades to survive while waiting for artillery. Once Slovek Howitzer appears, avoid taking unnecessary tower types that compete for blueprint or expertise offers. Build the artillery behind a long, narrow path or a deliberate choke. Upgrade the Howitzers rather than spreading resources across unrelated weapons, and keep at least one anti-air answer if the wave composition demands it.
If the third copy does not appear, do not assume the run failed because of placement. Blueprint offers are random, and community advice about drop weighting is partly speculative. The most defensible plan is to maximize offer quantity, minimize competing building types and repeat the route across several runs.
- Use a blueprint-friendly commander or faction when available.
- Choose Slovek Howitzer every time it appears during the normal run.
- Keep a minimal survival package while saving resources for artillery upgrades.
- Use a long firing lane, preferably with enemies funneled through a choke.
- Do not rely on Endless mode to satisfy the objective unless the game explicitly confirms it.
| Goal | Recommended choice | Reason |
|---|---|---|
| Find the first Howitzer | Extra blueprint or reinforcement opportunities | More offers improve the chance of seeing it |
| Survive before artillery | Mirador, bunker or barricade core | Prevents the greedy route from collapsing |
| Maximize artillery value | Long lane, height and choke | Improves target access and repeated firing |
| Finish the objective | Complete all three during normal rounds | Community reports warn Endless progress may not count |
The Howitzer route combines verified building and blueprint mechanics with community observations about faction bonuses and unlock counting. The latter may change or may depend on conditions not exposed in public documentation.
FAQ
Common questions
What is the safest first build?
Use Miradors and Sturdy Bunkers around the HQ, raise the important towers to height 2 or 3, and upgrade the core before adding many new structures. Add anti-air coverage when flying enemies appear.
Is Negotiation Skills a combat skill?
No. It is an economy-oriented doctrine that increases Supply amounts offered during reinforcement. It helps you buy buildings and upgrades, but it does not directly increase weapon damage.
Should I always choose Negotiation Expertise after Negotiation Skills?
No. They serve different purposes. Take the supply doctrine when reinforcement resources are limiting you. Take the range-oriented expertise only when its associated building is already central to the run.
How do I improve weapon stats without memorizing a tier list?
Open the advanced-stat display and compare damage, range, reload, rate of fire, area coverage and air capability. Then judge those numbers against the lane you built, because path length and height strongly affect real performance.
What is the best way to get three Howitzers?
Use a blueprint-focused route, select Slovek Howitzer whenever it is offered, keep your tower pool narrow, and build the artillery behind a long choke. Community evidence suggests normal rounds are safer for the objective than Endless mode, but the exact unlock rule is not fully confirmed officially.
Sources
What we checked
Official listings establish current availability and product facts. Community pages are used for mechanics and build history, then labeled separately.
- OfficialTower Dominion on Steam, current game description and update history
- ReferenceTower Dominion Wiki, commanders and building mechanics reference
- ReferenceTower Dominion Wiki, Negotiation Skills doctrine
- CommunityPro Game Guides, beginner build order and terrain advice
- CommunitySteam Community discussion, three-Howitzer route observations